Monet-Inspired Koi Pond Project
Time: 2-3 Class Periods
Difficulty: Advanced
Cleanup: Soap & Water
Materials:
Difficulty: Advanced
Cleanup: Soap & Water
Materials:
Project Kit (see Products Used below steps)
Scissors
Glue Stick
Watercolors
Oil Pastels
Art Straws
Black Pony Beads
Paint Brush
Cardstock
Tape
Glue
Bowl
Scrap Yellow Construction Paper
Materials needed if not using Project Kit:
Chipboard
16-Gauge Wire
Pink Tissue Paper
Claycrete Papier Mache
Green Construction Paper
Scissors
Glue Stick
Watercolors
Oil Pastels
Art Straws
Black Pony Beads
Paint Brush
Cardstock
Tape
Glue
Bowl
Scrap Yellow Construction Paper

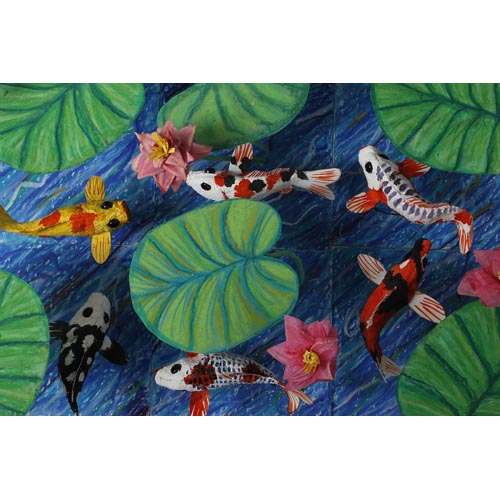
Create your own Monet-style pond with Claycrete Koi Fish! This project also has an instructional video available!
Click here to print a PDF of this projectSteps
 Step 1Draw a 5" koi fish and two pectoral (side) fins on a piece of cardstock. Cut out with scissors. For younger children, you can use this template: Koi Fish Template
 Step 2In a bowl, mix Claycrete Papier Mâché according to the package instructions. Use about 1/2 cup of mixture for each fish.
 Step 3Cover both sides of the fish body with Claycrete and insert black pony beads for eyes. Slope the back, leaving the tail and fins uncovered.
 Step 4Make two slots for the pectoral fins, insert them and press Claycrete around them. Before Claycrete dries, bend 6" of 16-gauge wire into an L shape and insert it into the underside of the fish body. When Claycrete is dry, paint with watercolors and let dry.
 Step 5To make the flower, cut a strip of 15 x 1-1/2" tissue paper. Fold the strip in half 4 times to make 16 sections. Draw teardrop shapes on the tissue with oil pastels and cut them out. Cut a strip of 1x2" yellow construction paper and make small cuts to fringe. For the stem, cut a 16" green art straw in half. Insert a 10" length of 16-gauge wire into the art straw and attach with glue (the extra wire at the bottom will attach to the base). Glue the yellow fringe around art straw. Pinch the petals and glue them around the yellow fringe, building up layers as necessary.
 Step 6Draw a lily pad on a quarter sheet of 9x12" green construction paper with oil pastels and cut it out. Insert a 10" length wire into the other 8" art straw and attach with glue. Bend the top 3" of the straw and flatten, then glue to the bottom side of the lily pad. Try to keep all the lily pads at a consistent height, since they would all float on top of the water.
 Step 7Use oil pastels to create the pond base on a 6x6" sheet of chipboard.
 Step 8Poke holes in the base and insert the fish, flower and lily pad. Trim the wire of the flower and fish to the desired height, leaving an extra 2" at the bottom. Bend all the wires parallel to the chipboard and tape to secure.