Claycrete Fruit Bowls Project

Time: 3-4 Class Periods
Difficulty: Moderate to Advanced
Cleanup: Soap & Water
Materials:
Difficulty: Moderate to Advanced
Cleanup: Soap & Water
Materials:
AMACO Claycrete Papier Mache
Richeson Plastic Painting Bowls
Acrylic Paint
Measuring Cups
Plastic Wrap
Paintbrushes

Claycrete is non-toxic, comes in powder form and mixes with water to form a paste. When in paste form, it is modeled or applied over an armature. Claycrete starts setting up in 30 minutes, then detailed modeling can be done. Additions will stick to the form without any problem, because it will cling to any clean surface, but will not stick to the hands. It’s easy to prepare, easy to model and very economical. Finished projects dry bright white, very lightweight and durable.
Steps
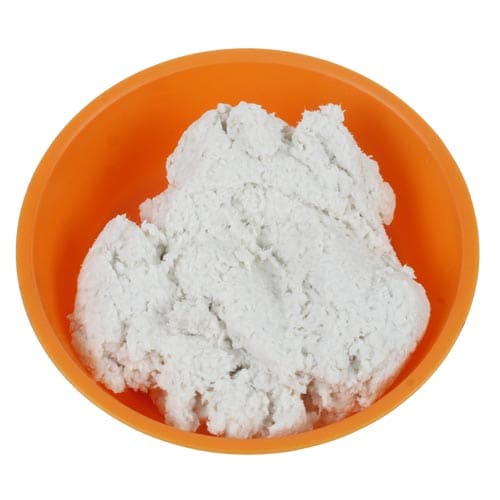 Step 1Mix Claycrete according to manufacturer’s directions. You will need approximately 2 cups of dry mix per project.
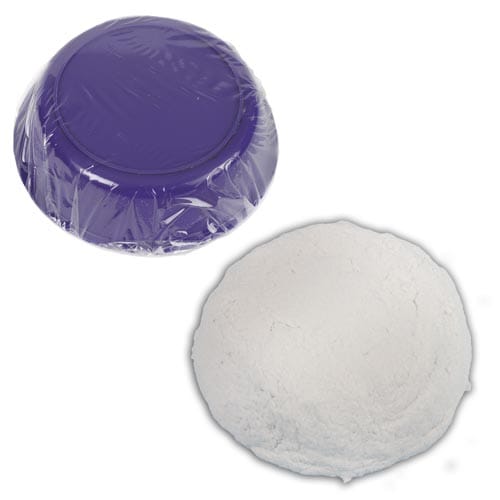 Step 2Cover a plastic painting bowl with plastic wrap and flip upside down. Place a layer of mixed Claycrete over the plastic wrap. Allow to dry at least 24 hours.
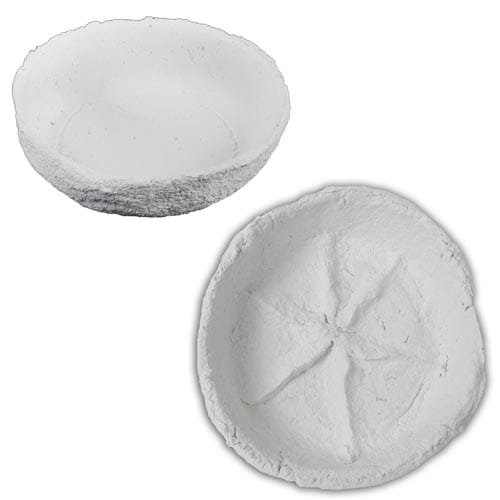 Step 3Remove Claycrete bowl from plastic bowl and discard the plastic wrap. The inside of the bowl will likely still be wet. Mix a small amount of Claycrete and add details to your bowl such as seeds, rinds, etc. You can also smooth out any imperfections or add Claycrete to creases that may have formed while drying. Allow to dry for 1-2 days.
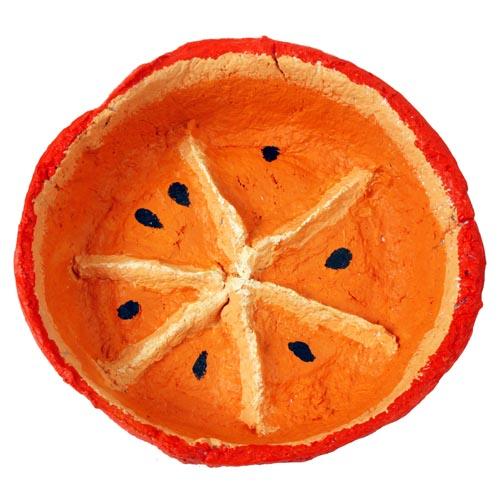 Step 4Paint your sculpted fruit bowl with acrylic paint. Allow to dry.
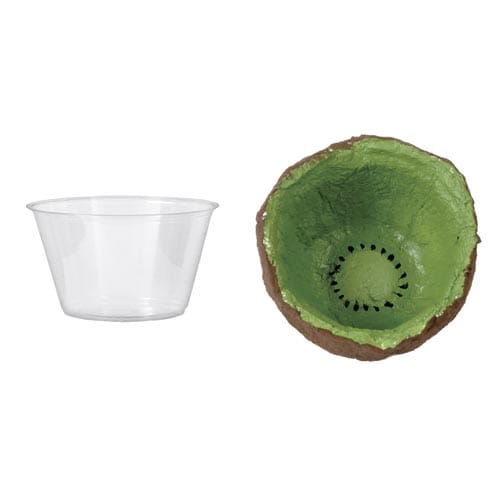 TipPlastic fruit or applesauce cups make fantastic molds for smaller fruits.