String Art Spider Web Project
Time: 2-3 Class Periods
Difficulty: Advanced
Cleanup: None
Materials:
Difficulty: Advanced
Cleanup: None
Materials:
Black Card Stock
Metal Needle
White String or Thread
White Gel Pen
Needle Tool
Pencil
Scissors
Tape
Ruler
Compass
Glue

Steps
 Step 1Cut 2-1/2" off the side of an 8-1/2 x 11" sheet of black cardstock so that you are left with an 8-1/2" square. Set the 2-1/2" strip aside, it will be used in a later step.
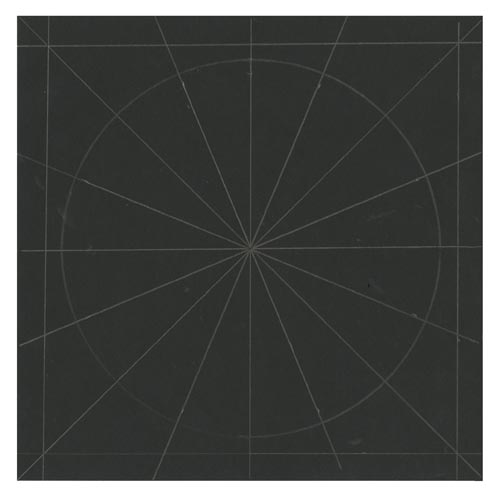 Step 2Use a ruler and a pencil, draw a 1/2" border around the edge of the square (it is okay if the lines overlap at the corners). Next, draw a horizontal and vertical line through the center of the square, dividing the square into quarters. Divide each quarter in half and draw a line through the center. Divide each eighth in half and draw a line through the center. You should have 16 lines (spokes) that radiate out from the center. Finally, use a compass to draw a circle 1/2" to 1/4" inside the 1/2" border.
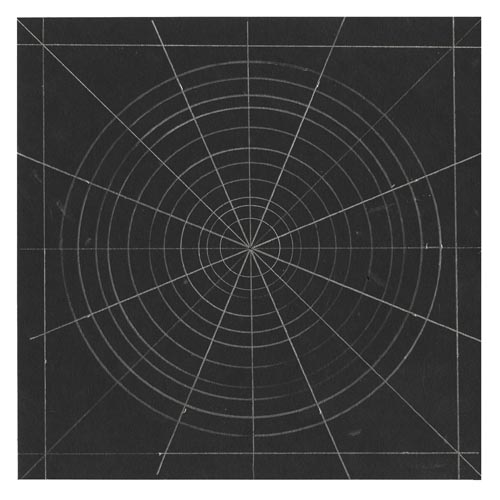 Step 3Use the compass and the pencil to draw more circles inside the original circle. Our example has circles that are about 1/4" apart; you can make the circles farther apart if desired.
 Step 4Using the Pro Tool or other needle tool, poke holes at each point where the spokes intersect the circles and the outside border, as well as where all the spokes intersect in the middle of the square.
 Step 5First string the spokes. Thread a needle and tape the end of the string just inside one of the corners of the square. Push the needle through the corner hole and pull the string through the front (the side without pencil markings). Next push the needle through the center hole and pull the string through to the back. Repeat this process with every spoke hole on the border, always returning through the center hole. Tie on more string as needed.
 Step 6Next string the web. On the front, thread the needle and tie the end of the string/thread to one of the spokes near the hole that intersects the largest circle. Moving clockwise around the circle: on the right-hand side of the next spoke, push the needle through to the back of the square.
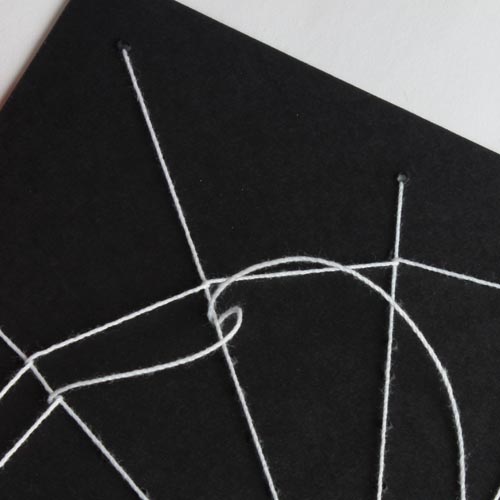 Step 7Return to the front through the same hole, this time making sure the needle and thread are on the left side of the spoke. This allows you to make a "loop" around the front and back spokes at the same time, which keeps the thread in place.
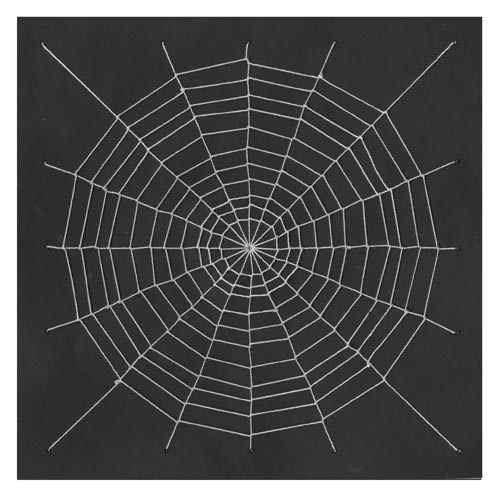 Step 8Continue this pattern along each circle to form the web.
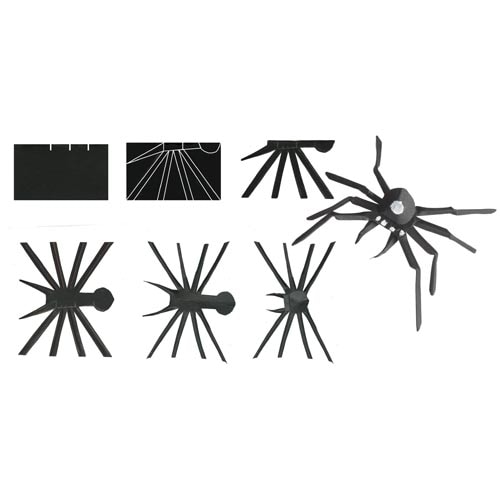 Step 9Use a 2-1/2" square of cardstock to make a spider. Fold the strip in half and draw the body, fangs and legs on one half of the cardstock, as shown. Cut out the spider with scissors and form as desired. Use a white gel pen to add eyes and other markings.
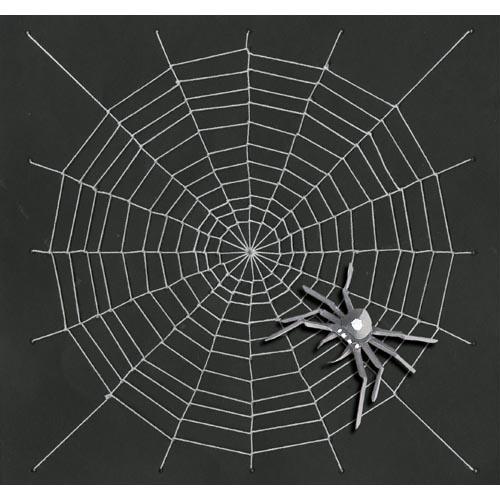
 Step 10Add some glue to the spider's legs and attach to the web to finish.