Burlap Gnomes Project

Time: 2-3 Class Periods
Difficulty: Moderate to Advanced
Cleanup: None
Materials:
Difficulty: Moderate to Advanced
Cleanup: None
Materials:
Burlap
White & Assorted Color Yarn
Embroidery Thread
Craft Felt
Yarn Needles
Round Wooden Beads
Fine Point Black Sharpie Marker
Scissors
Metal Embroidery Needles
White Glue & Sponge Brush (Optional)

Make cute gnomes with burlap, yarn, felt and thread! This project also has an instructional video available!
Steps
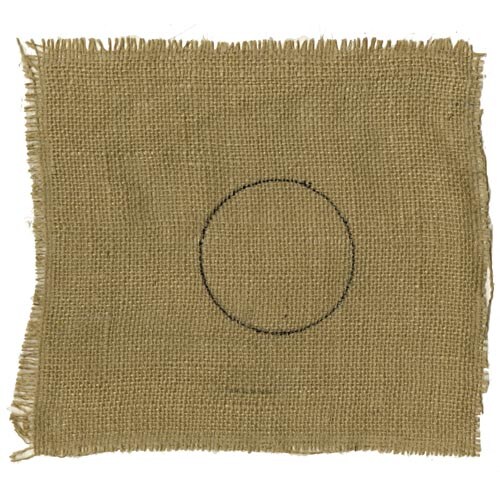 Step 1Cut a piece of burlap at least 12" square or larger. To prevent the burlap from unraveling at the edges, brush a coat of white glue on the edges and allow to dry. Using a black Sharpie, draw a circle approximately 3-1/2" in diameter in the middle of the burlap.
 Step 2Cut 20-25 pieces of Pepperell white jumbo craft yarn approximately 16" in length.
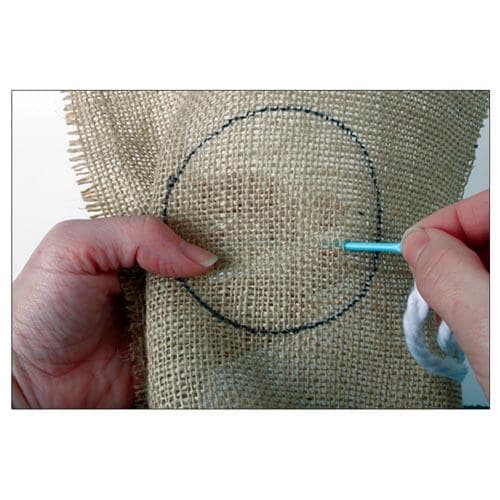 Step 3Using a yarn needle and starting on the front of the burlap, stitch a piece of white jumbo craft yarn in the approximate center of the circle. Leave both ends about the same length on the front side.
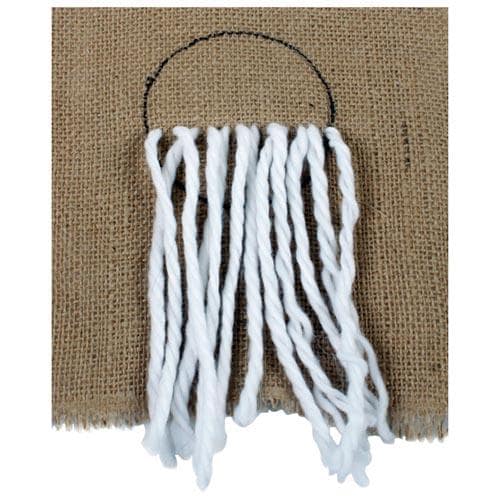 Step 4Stitch several pieces of yarn in a horizontal line across the circle, making sure to keep the ends even.
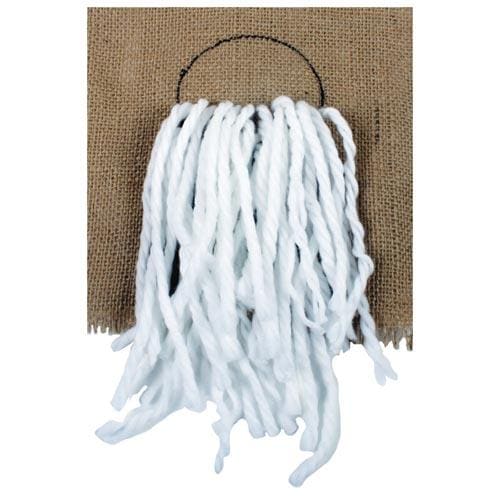 Step 5Stitch on the remaining pieces of yarn on the bottom half of the circle.
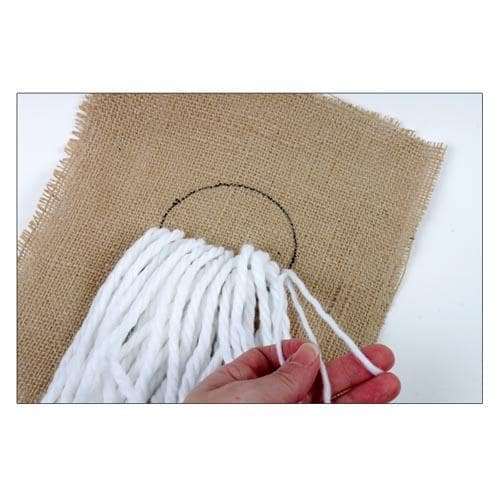 Step 6Each piece of yarn is made up of three strands. Separate the three stands of each piece of yarn.
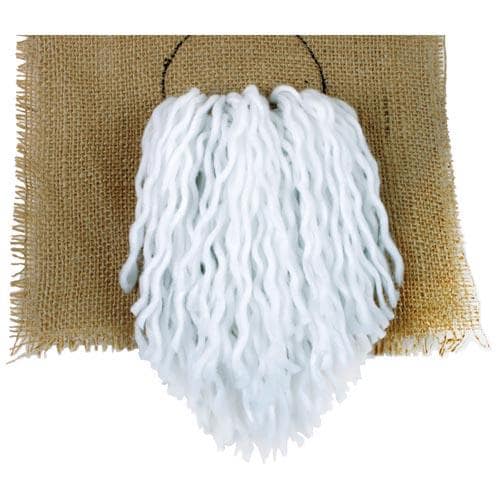 Step 7Trim the ends of the yarn to make a pointed, beard shape.
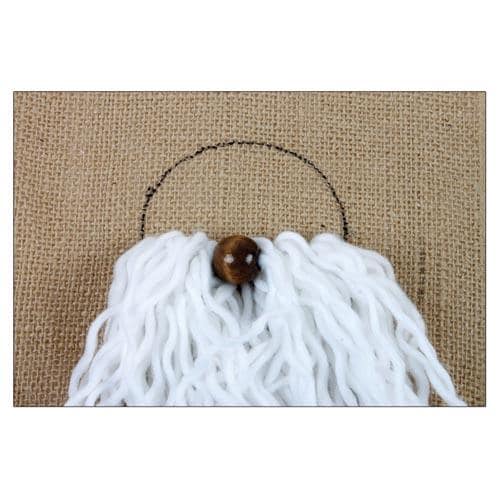 Step 8Select a large wooden bead. This will be the nose. Using one strand of white yarn, sew the bead in the middle of the circle so the top of the bead is about even with the top row of yarn.
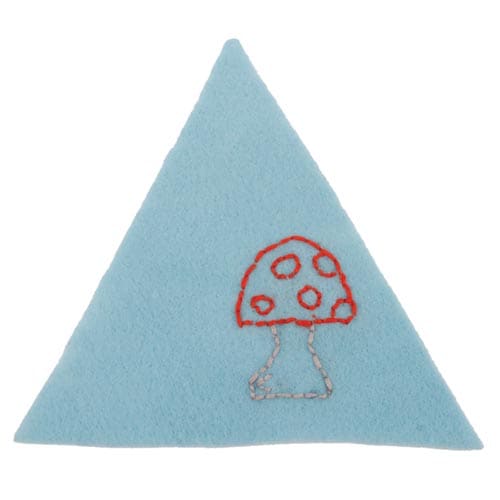 Step 9Cut a triangle shape from felt. Make sure the base of the triangle is at least 6" wide. Using embroidery thread, create a design or symbol on the hat.
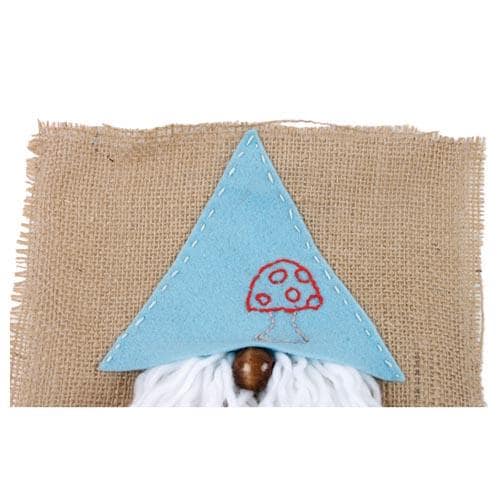 Step 10Using embroidery thread and an embroidery needle, stitch the hat to the burlap. Make sure the nose just peeks out from under the hat.
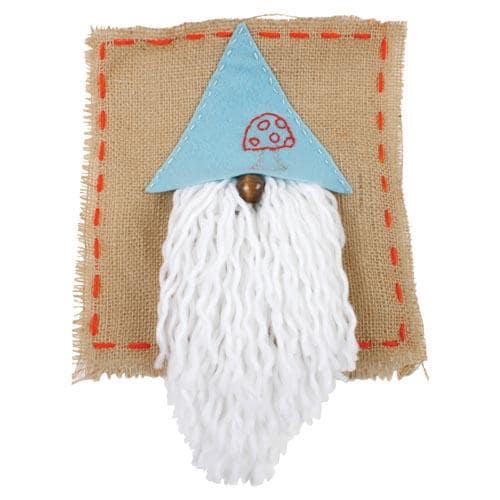 Step 11Using yarn and a yarn needle, sew a border on the burlap. Knot the ends together on the back.
 ExamplesHere are several of our gnomes for inspiration.
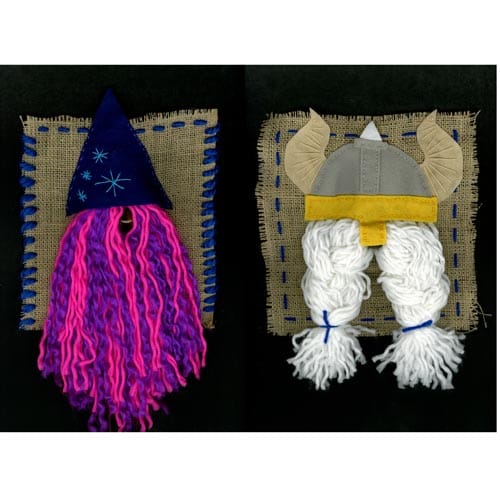 Bonus IdeasBe creative - use different colors of yarn for the beard; turn the beard into braids; or experiment with different hats, like our viking hat.