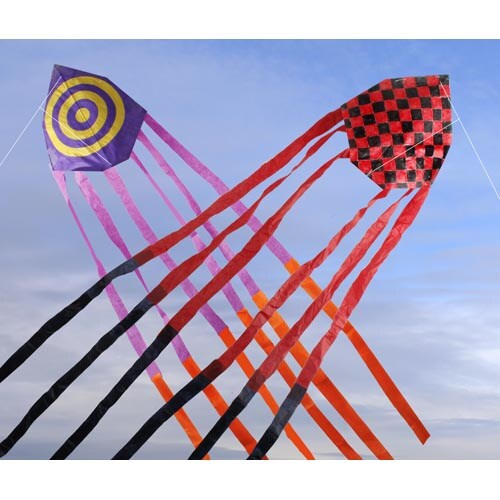
Easy Paper Kite Project
Time: 2-3 Class Periods
Difficulty: Moderate to Advanced
Cleanup: Soap & Water
Materials:
Difficulty: Moderate to Advanced
Cleanup: Soap & Water
Materials:
12x18" Newsprint Paper
#5 Round Reed (9/64" wide)
Tape
Scissors
Crayons, Colored Pencils or Markers
Colored Tissue Paper
Glue Stick
Ruler
Pencil
Kite String

Steps
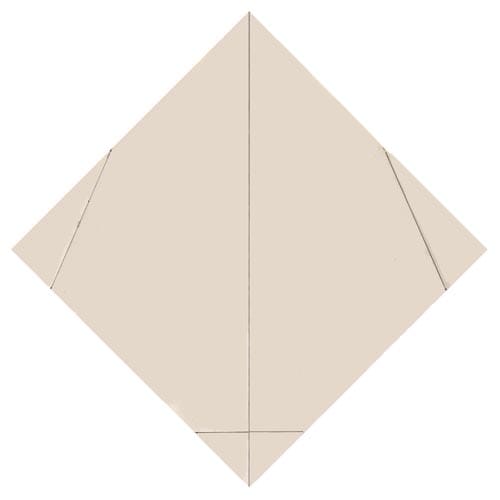 Step 1Cut 6" off a 12x18" sheet of newsprint, so you have a 12x12" square. Rotate the square 45 degrees so you have a diamond shape. From the left corner, measure 5" up and make a mark. From the same corner, measure 2" down and make a mark. Draw a line between the two marks. Repeat this on the right side. Draw a vertical line down the center of the diamond. Measure 2" up from the bottom corner and draw a horizontal line that bisects the center line. Fold the side flaps and the bottom flap in. This is the back of your kite.
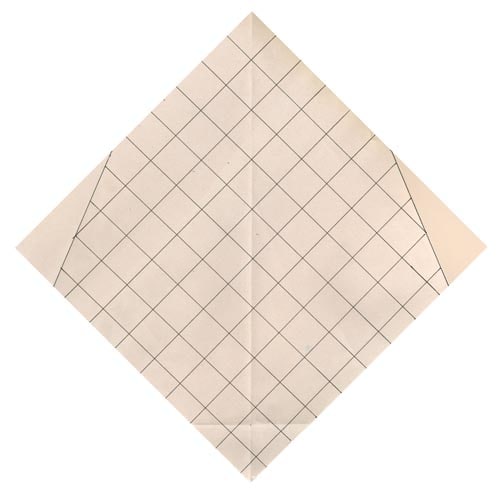 Step 2Flip the paper over and create a design on the front. Our example features a checkered pattern.
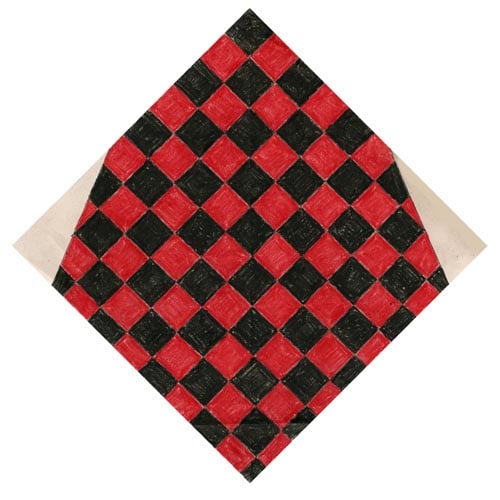 Step 3Color your design with crayons, colored pencils or markers.
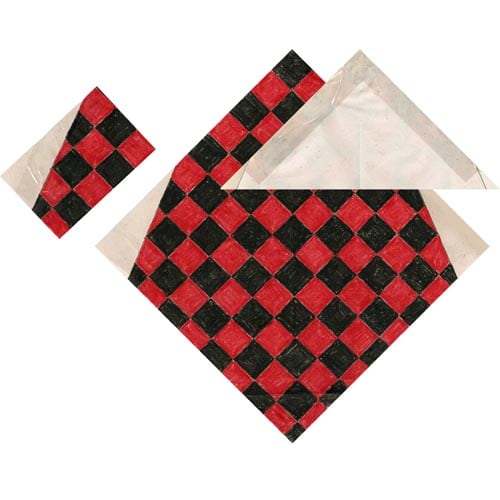 Step 4Reinforce the top edges by wrapping clear box sealing tape from front to back to keep the paper from tearing.
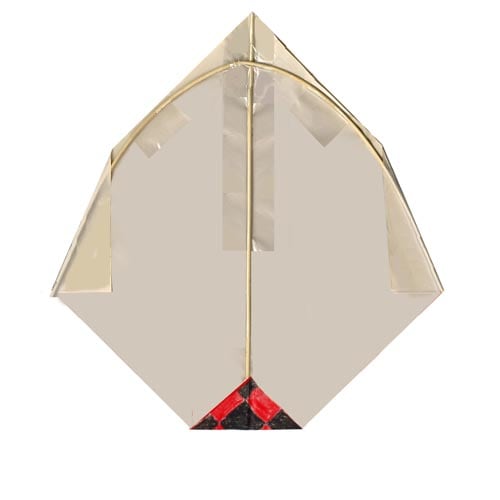 Step 5Cut a 14-1/2" piece of round reed for the center spine and tape in place along the vertical line on the back; tape only the top half for now. Trim the reed at the 2" horizontal line, if necessary, and fold the bottom flap up, then glue the flap on top of the spine. Cut a 22-1/2" piece of round reed for the top cross spar and soak it in warm water for 5 minutes so you can shape it easily. Shape the reed so that it traces the top edges of the kite, creating an arch in the center. Fold in the side flaps of the kite and glue, enclosing the reed on both sides; trim the ends if necessary. Tape the reed in place along the edges, and tape it to the center spine. Watch our YouTube Video for a visual demonstration of this process!
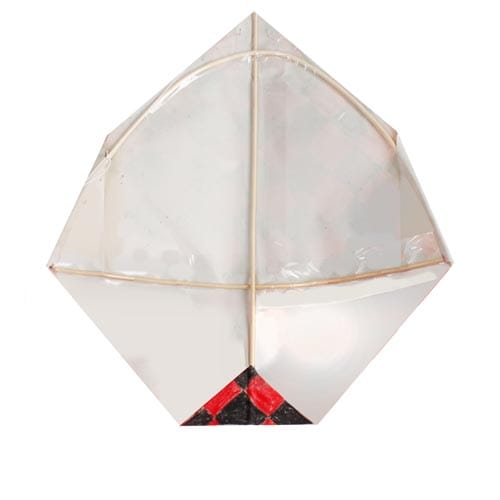 Step 6Cut a 13-1/2" piece of reed for the center cross spar and soak in water; shape so that it bows in the center. Insert the reed underneath the center spar and tape in place, keeping the bow shape. The kite will now be slightly rounded. Tape the bottom of the center spine for added strength.
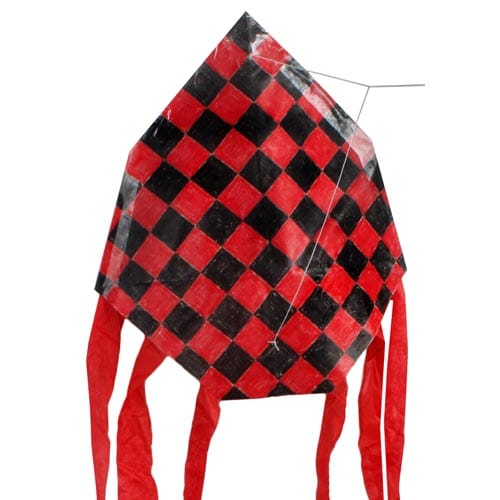 Step 7Cut strips of tissue paper and glue them to the bottom of the kite to create a tail. Create a bridle by attaching a length of string to the front of the kite. With a needle, poke a hole from front to back and thread the string around the top cross spar and spine, then back through to the front. Tie a knot. Repeat the process about 2" from the bottom of the kite to complete the bridle. Tie the kite string to the bridle and fly your kite!