Embroidered Lucky Rooster Project

Time: 2 Class Periods
Difficulty: Moderate to Advanced
Cleanup: Soap & Water
Materials:
Difficulty: Moderate to Advanced
Cleanup: Soap & Water
Materials:
Acrylic Felt in assorted colors
Embroidery Hoop
Embroidery Thread/Craft Thread
Needle
Sequins & Spangles
Scissors
Cotton Balls or Fiberfill
Work on sewing skills while making this felt rooster!
Steps
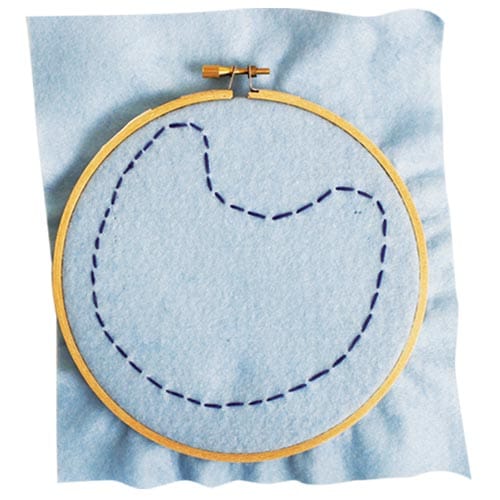 Step 1Choose a color of felt. Place felt in an embroidery hoop. Using a #18 needle and desired color of embroidery floss, sew the shape of a rooster’s body onto the felt using running stitching.
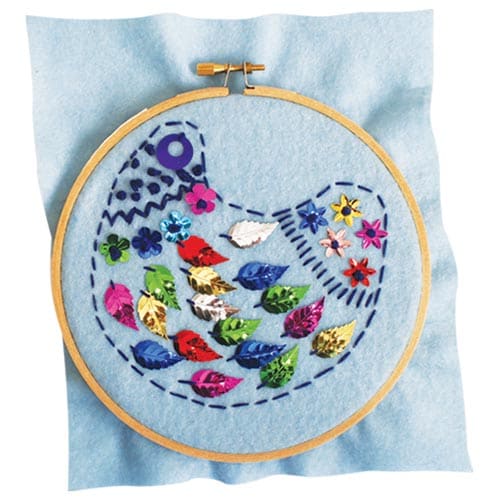 Step 2Next, embroider details onto body using more running stitching. Then sew sequins onto the rooster’s body using French knots.
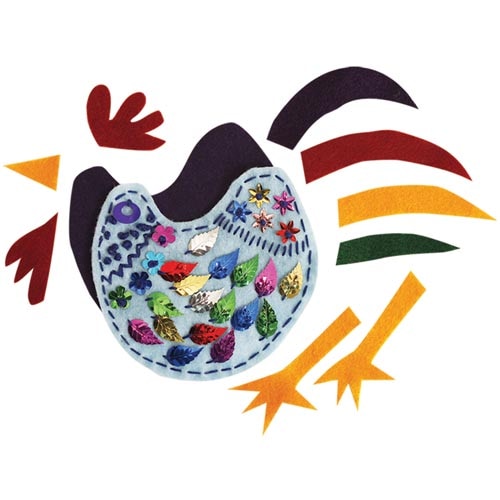 Step 3Trim out the body leaving 1/8 - 1/4" border. Cut out a duplicate body (back), plus tail feathers, legs, beak, cock's comb and waddle.
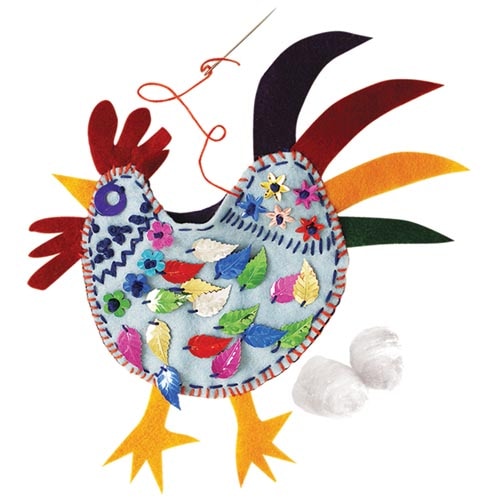 Step 4Sew around the edge of the rooster, make sure to place body parts between the front and back sides as the edges are sewn. When only a small area is left, stuff with cotton balls or fiberfill and then finish sewing the edge.
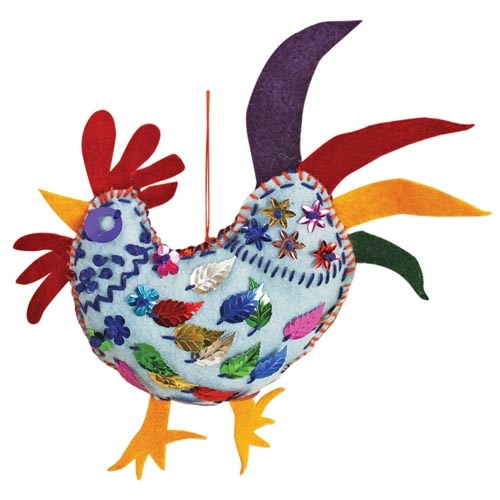 Step 5To finish, use the needle to add a hanging thread.