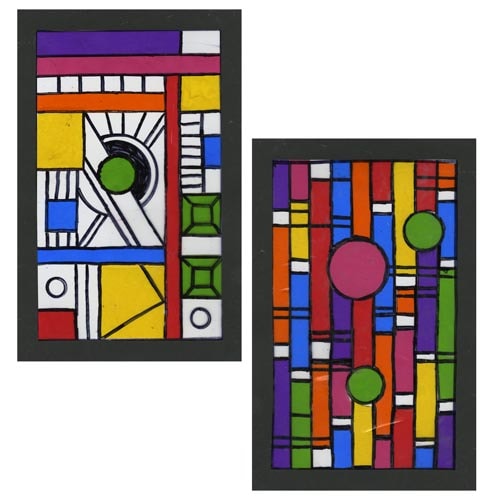
Frank Lloyd Wright-Inspired Faux Stained Glass Project
Time: 1-2 Class Periods
Difficulty: Advanced
Cleanup: Soap & Water
Materials:
Difficulty: Advanced
Cleanup: Soap & Water
Materials:
Project Kit (see Products Used below steps)
Scissors/Craft Knife
Extra Strength Glue Stick
Ruler
Graph Paper (optional)
Materials needed if not using Project Kit:
Black Card Stock
Grafix Clear Film
Hygloss Cello Sheets
Black Fine Point Permanent Markers
Scissors/Craft Knife
Extra Strength Glue Stick
Ruler
Graph Paper (optional)

Create your own faux stained glass artwork! This project also has an instructional video available!
Click here to print a PDF of this projectSteps
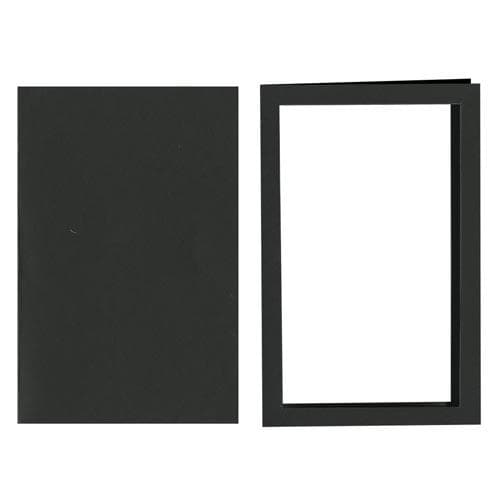 Step 1Make the Frame: Fold a sheet of 8-1/2 x 11" black card stock in half to 8-1/2 x 5-1/2". Draw a 4-1/2 x 7-1/2" rectangle in the center of the folded sheet; you should have a 1/2" border all around it. Cut out the rectangle from both layers of card stock, being careful not to cut into the 1/2" border.
 Step 2Cut an 8-1/2 x 11" sheet of Grafix clear film in half to 8-1/2 x 5-1/2".
 Step 3Draw strips, squares, rectangles and other geometric shapes on different colors of Hygloss Cello sheets. Place a sheet of graph paper underneath if desired to make sure lines are straight. Cut out the shapes.
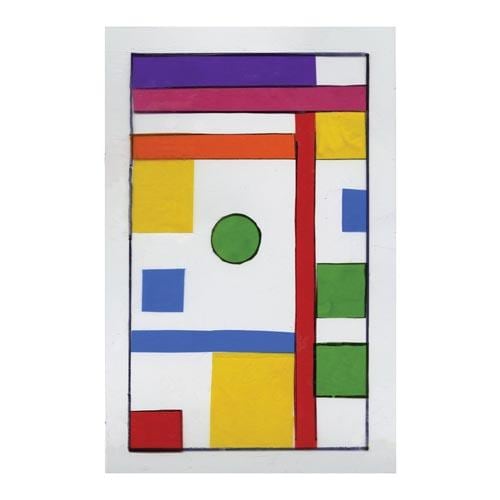 Step 4Draw a 1/2" border on the clear film sheet with a black Sharpie marker. Using works by Frank Lloyd Wright as inspiration, arrange the shapes on the film, leaving space for other patterns and simulated leading. Glue the cello pieces in place with an extra strength glue stick; Elmer’s Extra Strength Glue Sticks work best. The glue stick will help to keep the cello sheets from wrinkling and will dry clear.
 Step 5After the glue has dried, flip the film over and outline the shapes with the Sharpie marker to simulate leading. Draw other lines and patterns as desired. If darker "leading" is desired, turn the sheet back to the front and outline again.
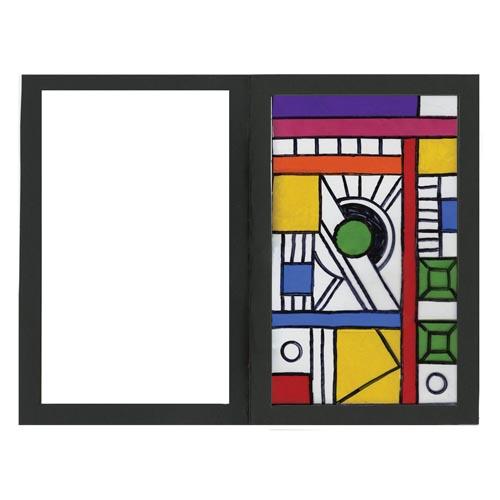 Step 6Glue the clear film sheet into right-hand side of the open frame.
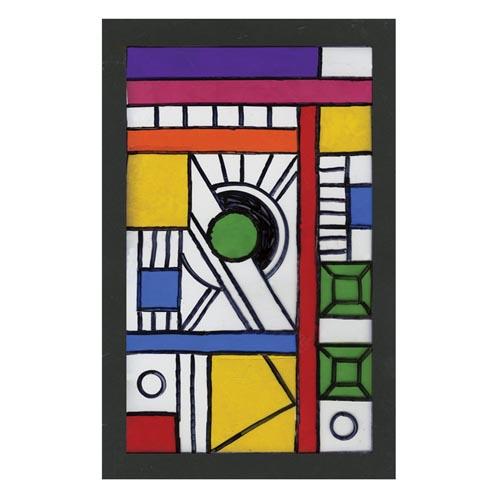 Step 7Put glue on the left-hand side of the frame and carefully fold over, pressing firmly to finish.