Geometric String Art Project
Time: 3 Class Periods
Difficulty: Moderate to Advanced
Cleanup: Soap & Water
Materials:
Difficulty: Moderate to Advanced
Cleanup: Soap & Water
Materials:
Project Kit (see Products Used below steps)
Pencil
Ruler
Scissors
Needle Tool
Materials needed if not using Project Kit:
Black Card Stock
Thread or String
Graph Paper
Metal Needle
Glue Stick
Pencil
Ruler
Scissors
Needle Tool

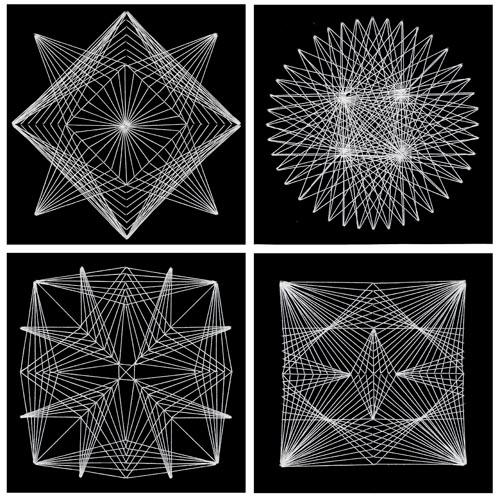
This project shows you how to make intricate Geometric String Art with just card stock, a needle and white string. For dot pattern examples, click here. This project also has an instructional video available!
Click here to print a PDF of this projectSteps
 Step 1Use a glue stick to attach a piece of graph paper to a piece of black card stock.
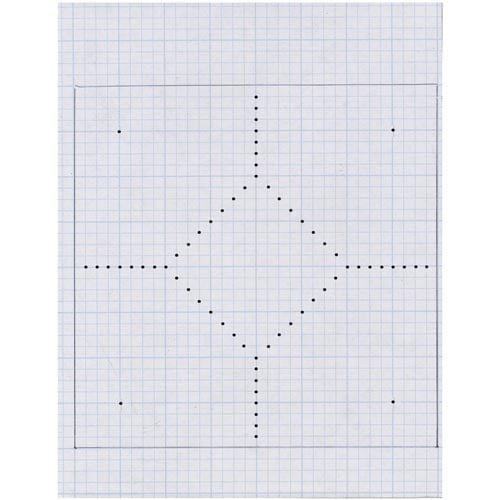 Step 2Draw an 8" square with the pencil. Using the graph lines as guides, draw "points" to make a symmetrical pattern design.
 Step 3Use a pencil and ruler to draw horizontal "target lines" across the paper to connect the points. Use the needle tool to punch a hole through each point.
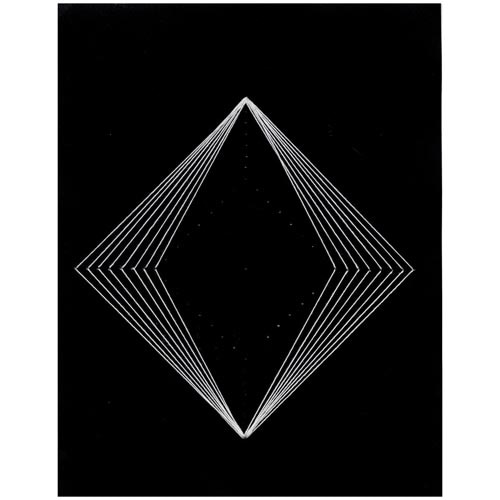 Step 4Cut 3 ft. of thread or string and thread the #18 needle. Pull through the first hole and tape the string to the paper to secure the end. Next, push the needle through the first hole on the "target line" from the front side of the paper. Return to the starting hole and repeat this procedure for each hole on the target line. Continue passing the string through the holes to complete the first layer.
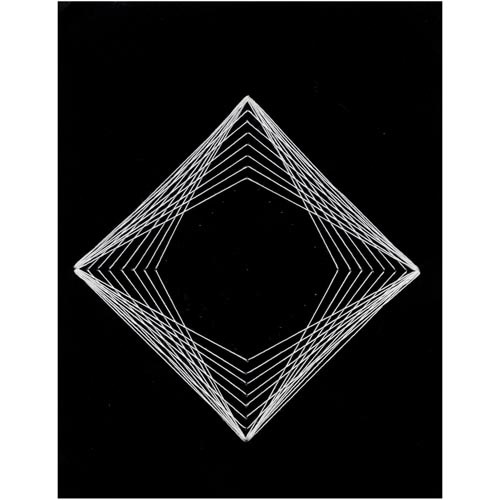 Step 5Repeat the complete procedure with the second layer of "target lines". If you run out of string simply tie more on and continue.
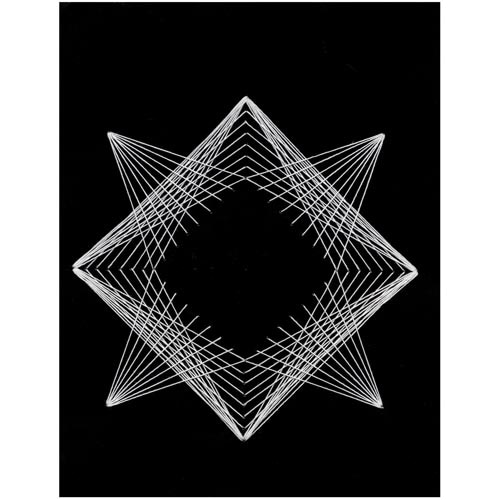 Step 6Repeat the complete procedure using the next set of point holes to add the third layer.
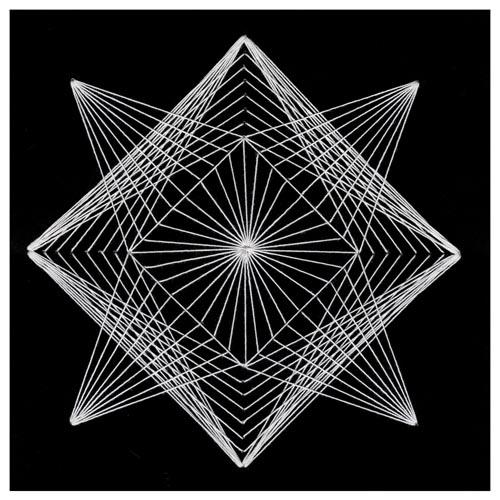 Step 7Repeat the procedure to add the fourth layer and finish by trimming out the 8" square.