Make Your Own Realistic Geode Project

Time: 3 or More Class Periods
Difficulty: Moderate to Advanced
Cleanup: Soap & Water
Materials:
Difficulty: Moderate to Advanced
Cleanup: Soap & Water
Materials:
Self-Hardening or Air-Dry Clay
White Chenille Stems
Liquid Watercolors
Glass jar with 3" or larger opening
Scissors
Craft Sticks
Water
Borax
Microwave or Stove
Measuring Cup
Acrylic Paints
Paintbrushes

Make a faux geode with borax, water, liquid watercolors and air-dry clay! This project also has an instructional video available!
Click here to print a PDF of this projectSteps
 Step 1Using a white chenille stem, create a circular loop that measures at least 1/4" smaller than the opening of the glass jar and twist to secure. Attach a second stem to the loop, shape into a half-circle, and attach to the other side of the loop. Continue to add stems in this manner, criss-crossing and wrapping around the stems to create a spherical, dome shape. As you add stems, the holes between them will get smaller; try to make them as small as you can. Allow the ends of the stems to poke into the center of the dome. Attach a final chenille stem to the top of the dome, and wrap the opposite end around a craft stick so that the dome can hang freely inside the jar. Make sure there is 1/4" of space on all sides, or you won't be able to remove it from the jar after the crystals have formed.
To see this step in real time, watch our video on YouTube. Step 2Boil 4 cups of water and pour into the jar, leaving a little bit of room at the top. Measure 1 cup of borax. Add a little bit of the borax to the hot water and stir to dissolve. Continue adding a small amount of borax at a time, stirring as you go. Once the solution becomes supersaturated, the borax will stop dissolving and no more borax is needed.
 Step 3To dye your crystal, choose a color of Handy Art Washable Liquid Watercolors. Add 3 tablespoons of liquid for lighter colors; 6 tablespoons for darker colors. The crystal will dry lighter than the color of the water. You can mix two or more colors together to create your own custom hues. Place the chenille stem dome into the solution, letting the craft stick balance on the jar opening.
 Step 4DO NOT move the jar, as this will hinder crystal formation. Wait 12 to 24 hours before removing the dome. After removing the dome, cut off the hanging stem.
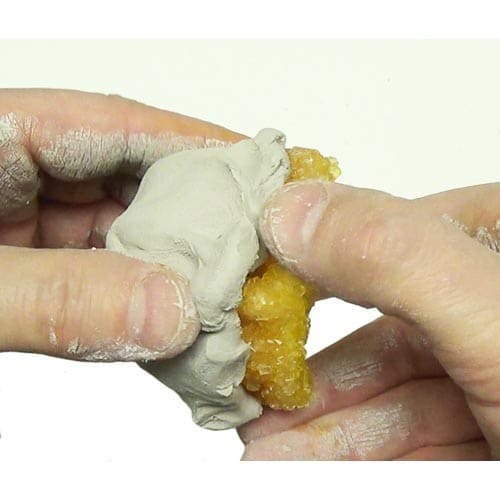 Step 5Using Self-Hardening or Air-dry clay, create a 1/4" thick slab, roughly the same size as the dome, and attach it to the outside of the dome. Take a small rock and press it into the clay several times to create a realistic rock texture. Allow the clay to dry overnight.
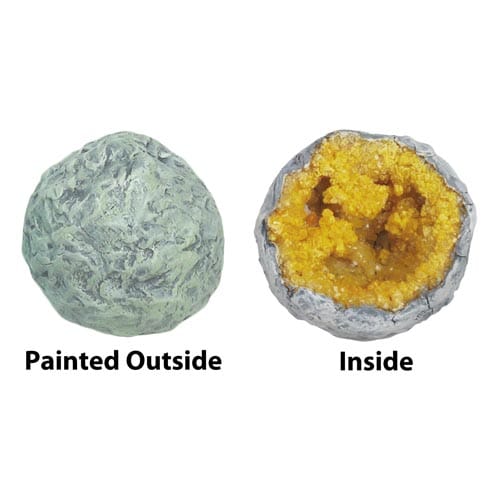 Step 6As the clay dries, it may shrink slightly, which might cause small cracks. Fill any unwanted cracks with a little more clay. Paint the clay with acrylics and let dry.
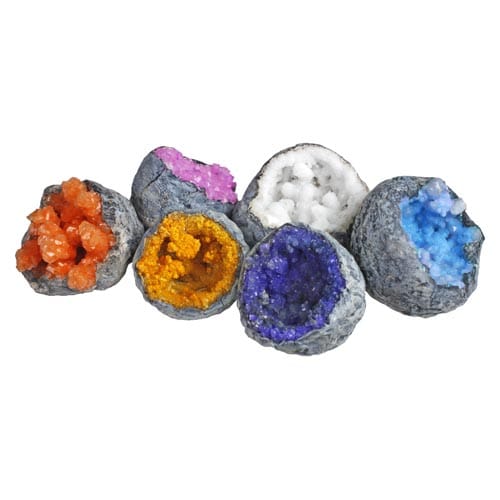 Step 7Experiment with the liquid watercolors to create crystals in an assortment of colors! You can also make white crystals by not adding any color to the solution in Step 3.