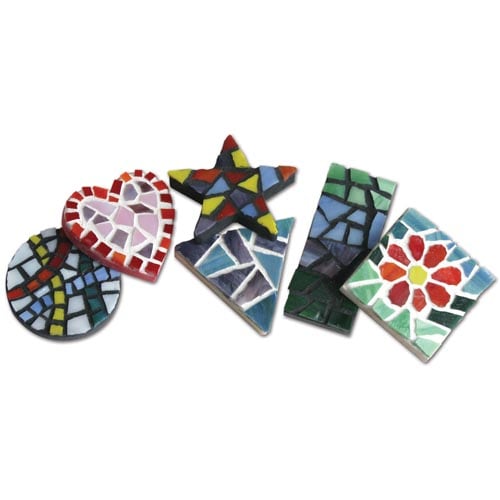
Miniature Mosaics Project
Time: 2-3 Class Periods
Difficulty: Moderate to Advanced
Cleanup: Soap & Water
Materials:
Difficulty: Moderate to Advanced
Cleanup: Soap & Water
Materials:
Tacky Glue
Glass Chips
Small Wood Shapes
Powdered Grout
Sponge
Wheeled Glass Nippers
Make unique miniature mosaics with wood shapes and glass chips.
Steps
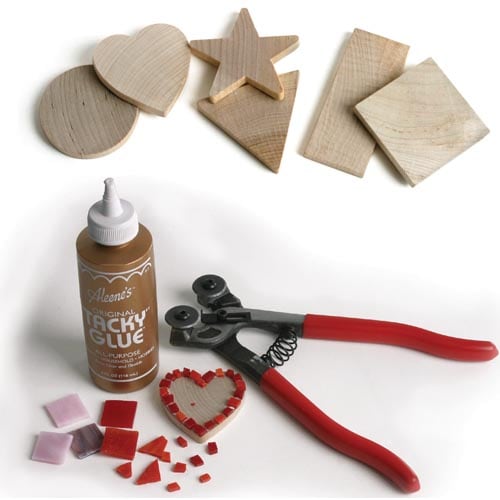 Step 1Choose your favorite wood shape and stained glass chips (each mosaic will use approximately 6-8 chips). Cut glass chips into smaller, desired shapes with the Wheeled Glass Nippers. Arrange glass to fit on the wood shape.
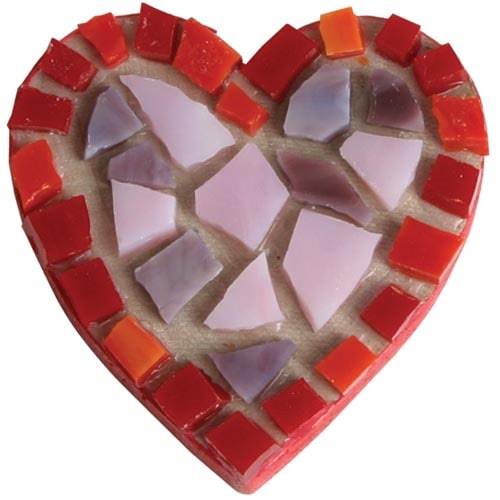 Step 2Glue each piece of glass securely to the wood shape with Aleene's "Tacky" Glue. Allow glue to dry thoroughly before grouting.
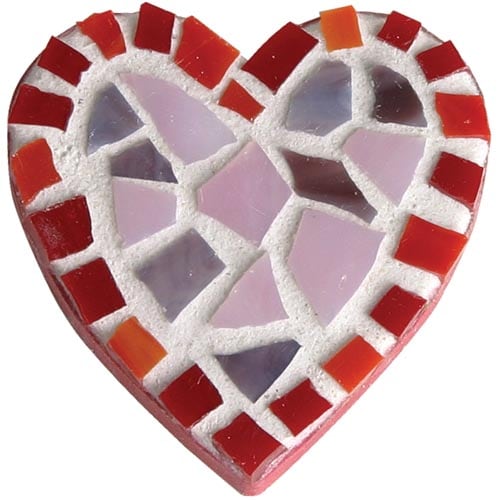 Step 3Apply white or black grout to finish the mosaic. (A 2 lb. tub of grout will be enough for an average-sized class.) Clean mosaic (before grout is completely dry) with a damp sponge.