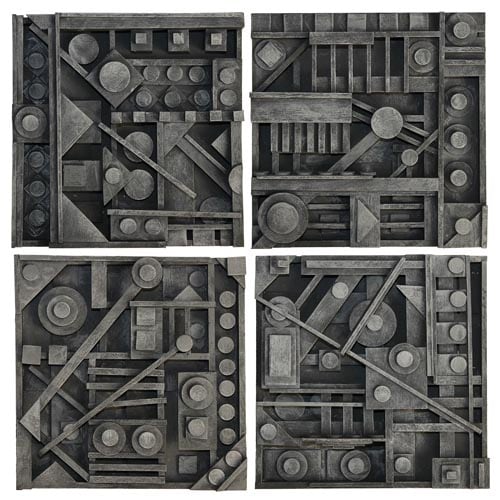
Nevelson-Inspired Wood Strip Relief Project
Time: 2-4 Class Periods
Difficulty: Moderate to Advanced
Cleanup: Soap & Water
Materials:
Difficulty: Moderate to Advanced
Cleanup: Soap & Water
Materials:
Cardboard or Chipboard
Assorted Wood Shapes
Tacky Glue
Wood Strips or Craft Sticks
Semi-Moist Tempera Cakes
Super Easy Cutter or Craft Knife
Paint Brush
Ruler (optional)

Use pieces of wood to create a Louise Nevelson-inspired relief project. This project also has an instructional video available!
Steps
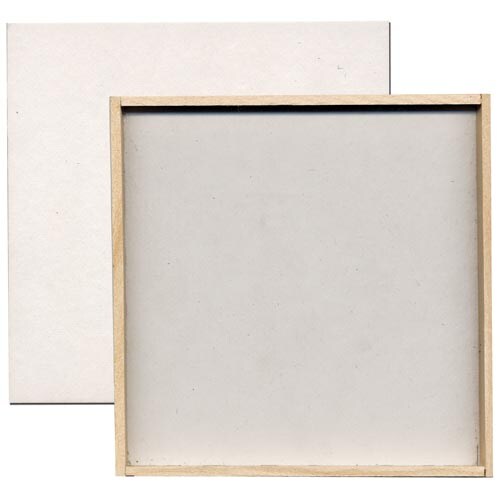 Step 1Use the Super Easy Cutter or a craft knife to cut wood strips for the frame of the relief. Glue strips onto chipboard (we used a 6x6" piece, but a 12x12" piece could be used instead).
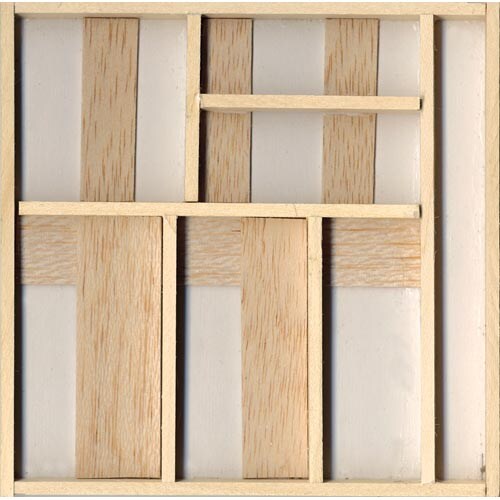 Step 2Continue to cut and add more wood strips to create a grid background.
 Step 3Add wooden shapes and wood strips to advance the design. Use the Super Easy Cutter or a craft knife to cut angles on strips, if desired.
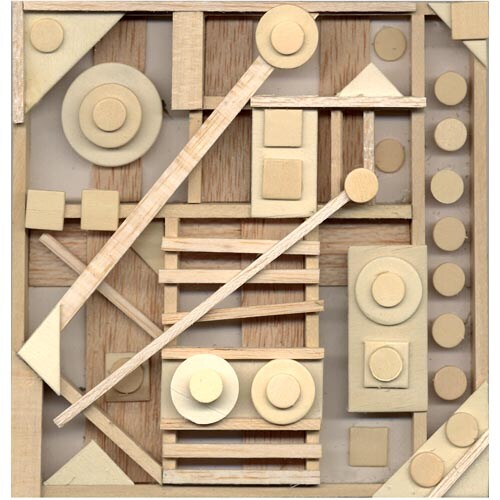 Step 4Continue adding smaller wooden shapes and more wood strips to finish the design. You can cut smaller shapes from larger pieces, if desired.
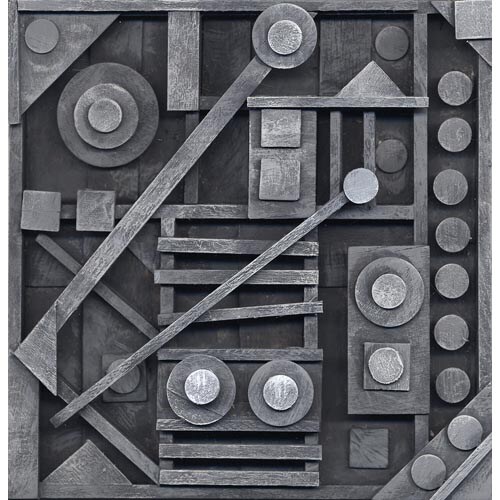 Step 5Paint the design with black tempera cake paint. Make sure to add a small amount of water to the paint brush and mix up lots of paint so that the paint is not too thin or watery. Once black paint is dry, use dry brush painting technique to add white highlights.