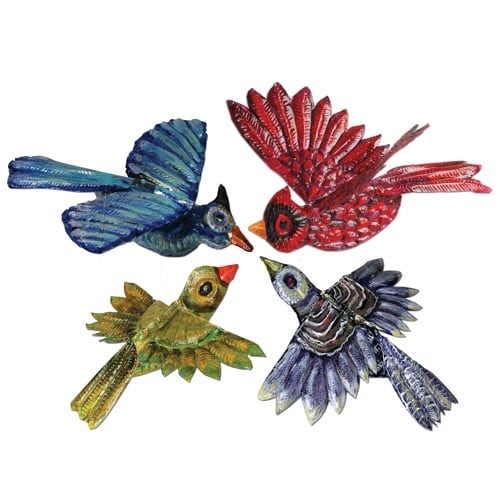
Painted Tooling Foil Birds Project
Time: 2 Class Periods
Difficulty: Moderate to Advanced
Cleanup: Soap & Water
Materials:
Difficulty: Moderate to Advanced
Cleanup: Soap & Water
Materials:
Permanent Marker
9x12" White Drawing Paper
Scissors
Decorator's Tooling Foil
Tooling Foil Liner Tool
Acrylic Paints
Glue (optional)
Hole Punch
String

Create your own bird using tooling foil! This project also has an instructional video available!
Steps
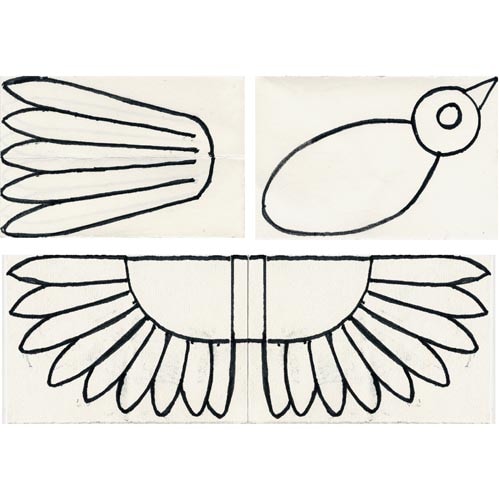 Step 1Draw bird design on a sheet of drawing paper. You can use our template if desired: Bird Template
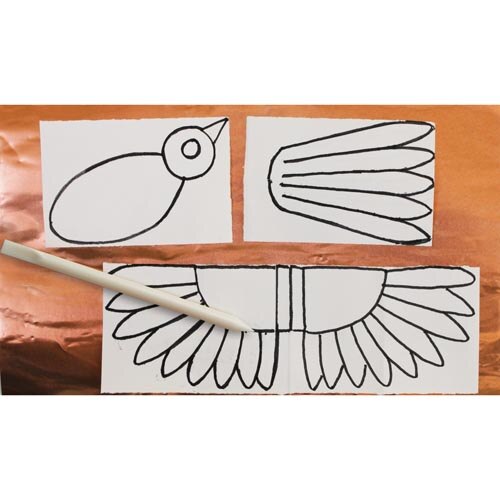 Step 2On a piece of tooling foil, use the liner tool to trace over the bird design to scribe it onto the foil.
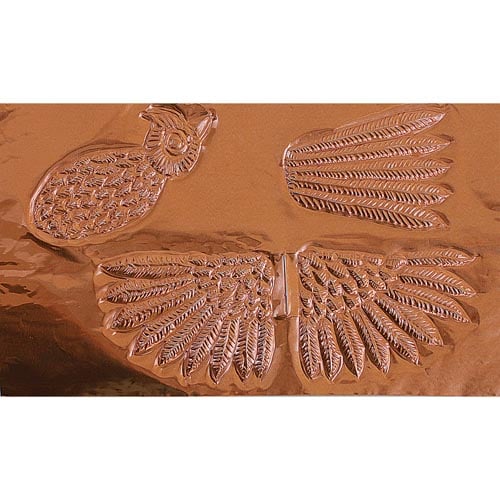 Step 3Use the tool to emboss feathers and additional details on the bird design.
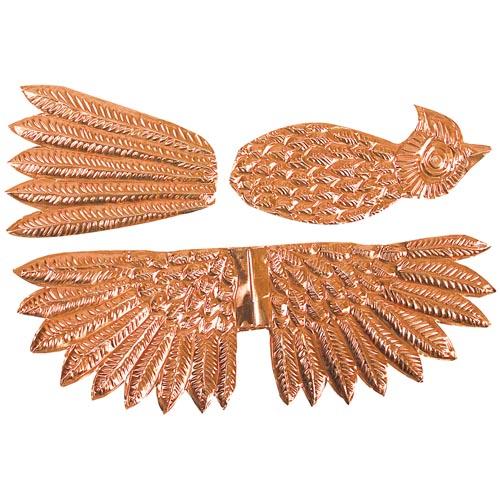 Step 4Use scissors to cut around the bird design.
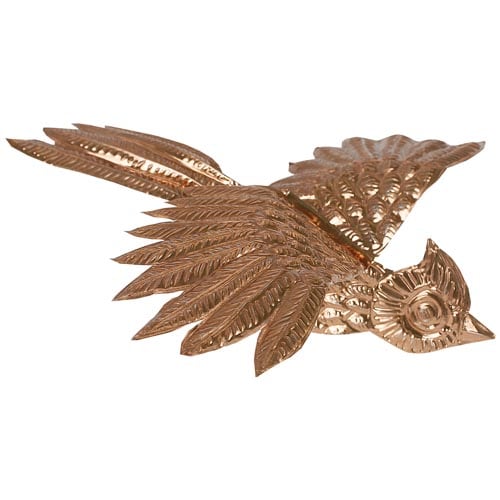 Step 5Fold and crimp the parts of the bird together. You can also use a fast-setting glue or epoxy to attach the pieces.
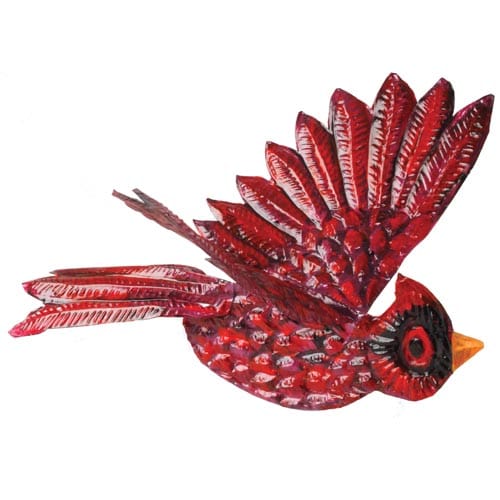 Step 6Paint the bird with acrylic paint. Find the balance point, then punch a hole and string for hanging.