Pop Art Tennis Shoes Project

Time: 1-2 Class Periods
Difficulty: Moderate to Advanced
Cleanup: Soap & Water
Materials:
Difficulty: Moderate to Advanced
Cleanup: Soap & Water
Materials:
White Card Stock
Markers and/or Colored Pencils
Glue Stick
Pencil or Pen
Scissors
Hole Punch
Yarn

Steps
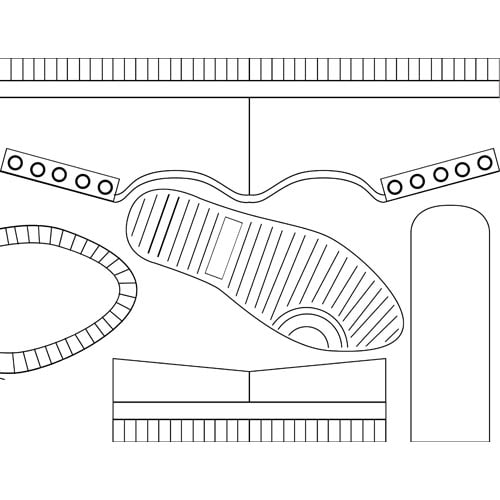 Step 1Draw a shoe template, as shown, on an 8-1/2 x 11" sheet of cardstock. To see the pattern take shape, watch our video on YouTube. Or, you can view and print our template here.
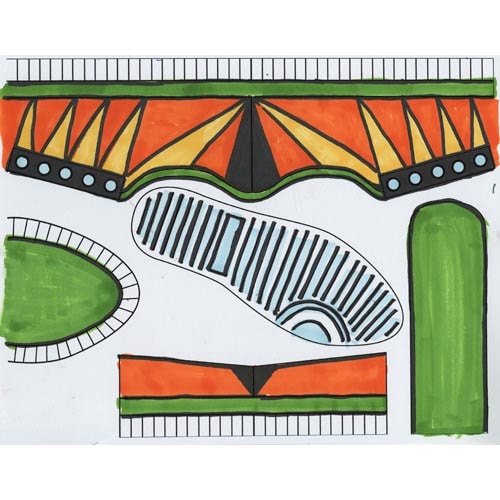 Step 2Design a pattern and color the shoe with your favorite colored pencils or markers - we used Mr. Sketch Scented Markers to make it a "smelly shoe"!
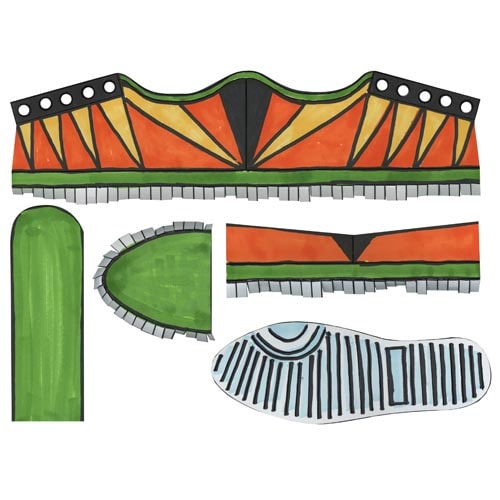 Step 3Cut out the pieces with scissors and fringe the tabs on the heel piece, toe side panel and toe insert. Use a hole punch for the eyelets.
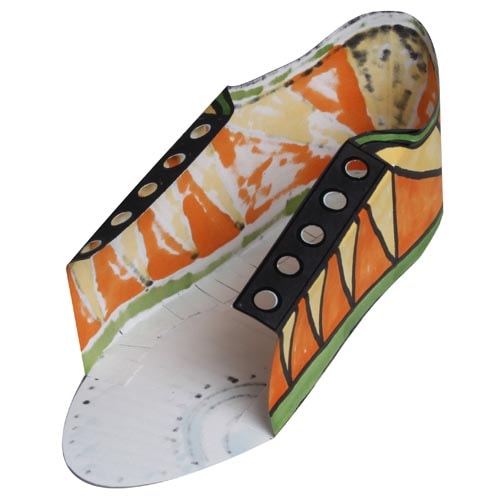 Step 4Glue the heel piece to the sole of the shoe: apply glue stick to the tabs and to the sole of the shoe. Fold the tabs to a 45-degree angle and attach them to the non-printed side of the sole, start at the ball of the shoe and wrap around the heel to the other side. The tabs allow you to easily round the heel.
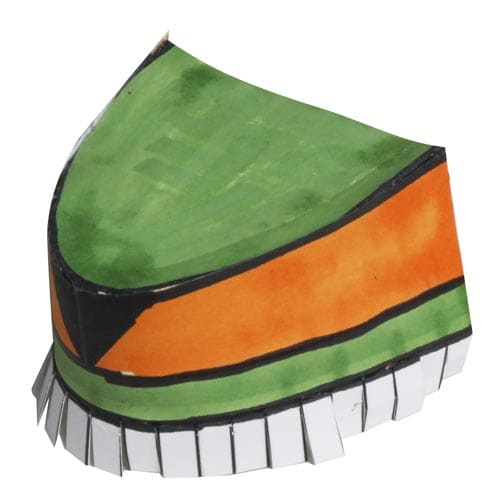 Step 5Next, apply glue to the tabs on the toe insert and on the inside of the toe side panel. Attach the toe insert to the toe side panel to create the toe assembly.
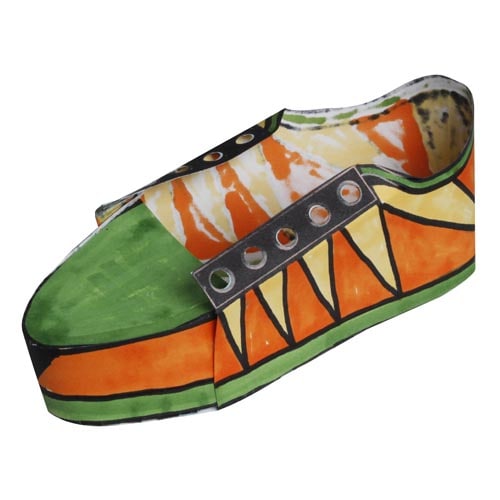 Step 6Apply glue to the tabs on the bottom of the toe assembly and to the front of the sole, then adhere both parts, tucking in and overlapping the heel part that's already been glued down.
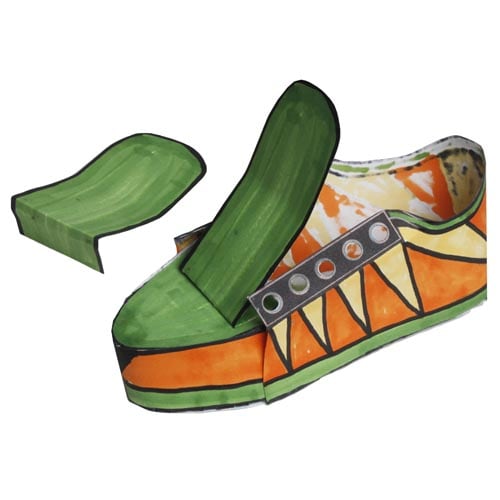 Step 7Fold the bottom edge of the tongue underneath itself and glue to the toe assembly.
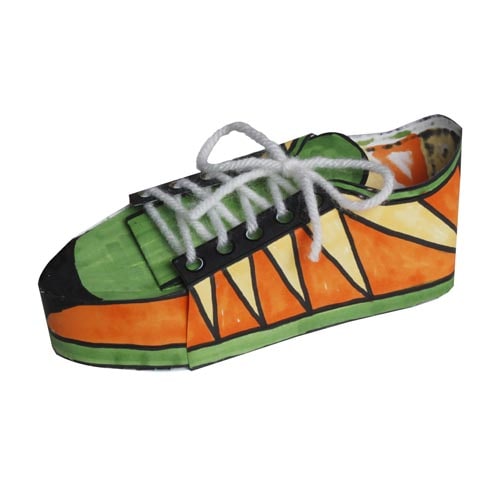 Step 8Fold the eyelets in and "lace up" the shoe with yarn.
 Step 9Be creative and make several designs! Watch our YouTube Video for ideas on decorating shoes with WonderFoam, plus making a soft sculpture shoe with canvas.