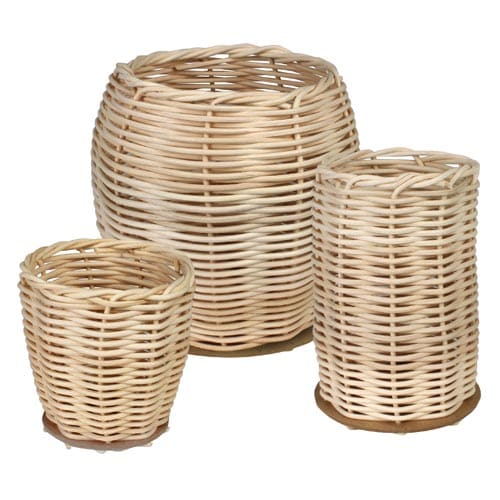
Reed Basket Weaving Project
Time: 1-2 Class Periods
Difficulty: Moderate To Advanced
Cleanup: None
Materials:
Difficulty: Moderate To Advanced
Cleanup: None
Materials:
#4 Round Reed (1/8" wide)
Basket Base
Bucket/Sink filled with water
Wire Cutters or Scissors

Steps
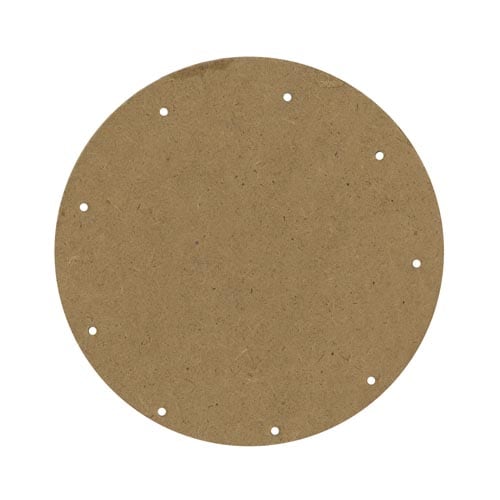 Step 1Our example uses a 4" round basket base, which has nine holes. You may need to adjust the measurements listed below to make larger or smaller baskets.
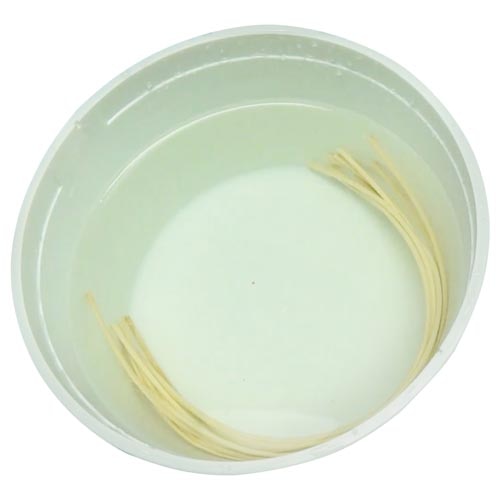 Step 2With wire cutters, cut nine 15" pieces of #4 wood reed; these will be the vertical spokes of the basket. Soak the reed in water for 5 minutes. Do not over soak. (Scissors can be used to cut the reed; however, we recommend using wire cutters.)
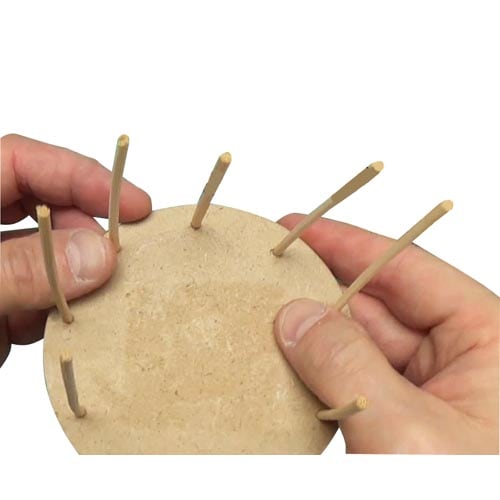 Step 3Insert one spoke into each of the nine holes in the basket base; the spokes should extend approximately 3" below the base.
 Step 4Weave the 3" sections together. Start by bending one spoke in front of the first spoke to its right, then behind the second spoke to its right. Continue this pattern with all the spokes; they should overlap and hold each other in place. Tuck the last spoke underneath the second spoke to its right. To complete the footer of the basket, trim any spokes that extend beyond the edge of the base.
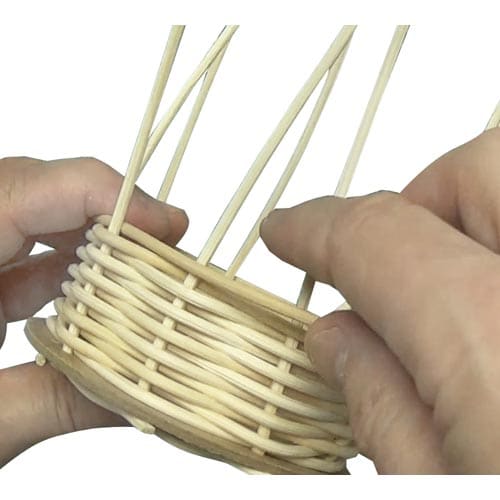 Step 5Cut a few more lengths of reed and soak. Tuck a soaked reed behind a spoke and weave in front of the next spoke, then behind the following spoke. Continue this pattern to build up the basket. When the first reed runs out, tuck in another reed and continue weaving.
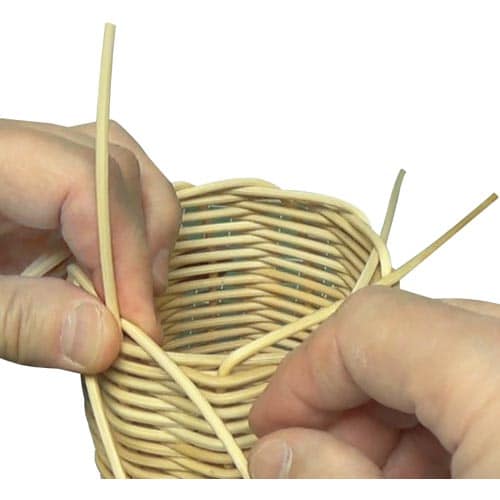 Step 6Once you reach your desired height, re-soak just the exposed spokes. Weave the rim in the same fashion as the base, tucking the last spoke underneath the second spoke to its right. All the spokes should now be pointing "out" of the basket. Take one spoke back over the top of rim, inside the basket, and back out through a hole in the rim. Repeat this with all of the spokes; two spokes can come out of the same hole if necessary. Trim any excess to finish.