Tessellation Stamp Project
Time: 2-3 Class Periods
Difficulty: Moderate to Advanced
Cleanup: Soap & Water
Materials:
Difficulty: Moderate to Advanced
Cleanup: Soap & Water
Materials:
Block Print Material or Carving Blocks
Tracing Paper
Pencil
Cardstock
Scissors
Tape
Block Printing Ink
Block Printing Paper
Linoleum Cutters or Linozips
Ink Tray
Brayer

Steps
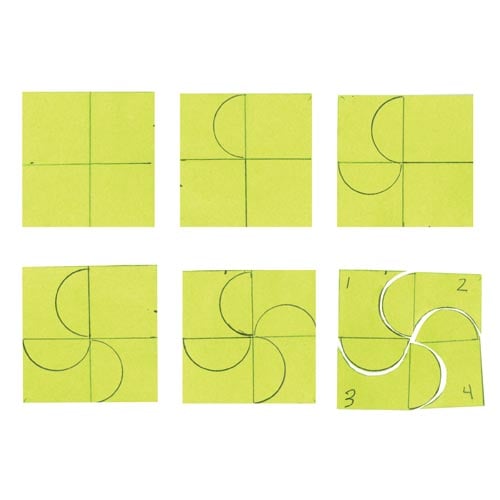 Step 1Divide a 2-1/2" square of cardstock into four equal quarters. In the top left section, draw a line, starting at the center and finishing at the top. Rotate the square 90 degrees and draw the same line. Repeat this two more times so all four sections are the same. Number the sections 1 through 4 in the outermost corners and cut apart on the lines you drew.
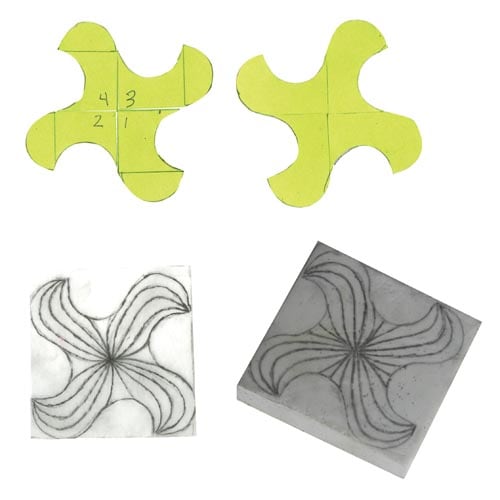 Step 2Arrange the sections so all the numbers are in the center, swapping the positions of sections 1 and 4, then sections 2 and 3. Tape the finished shape together and design a pattern inside. Using a pencil and tracing paper, transfer the shape and pattern onto both sides of a 2-1/2 x 2-1/2" square of Soft-Kut block printing material, making sure to align the shape on both sides.
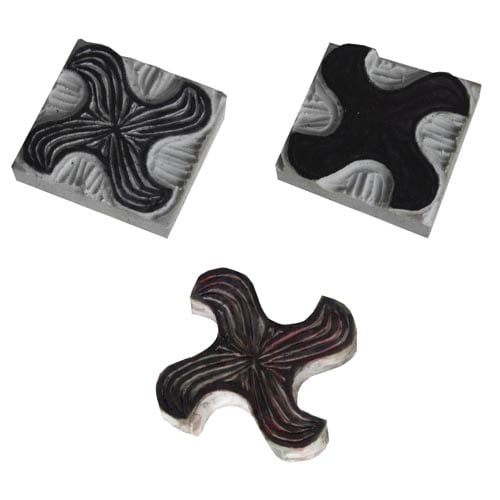 Step 3Cut out the shape and pattern on the top side of the block, then the shape on the bottom side. Trim away the sides on both top and bottom so only the shape and pattern remains.
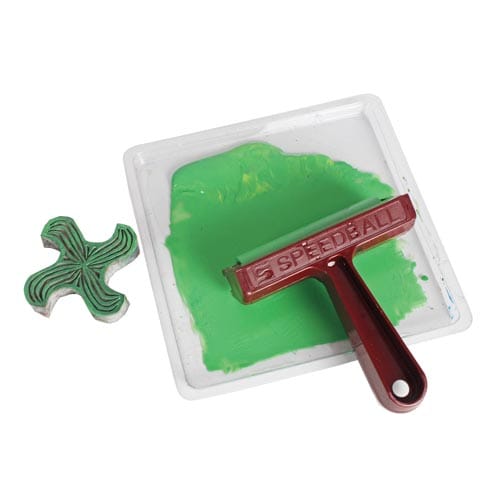 Step 4Roll out your choice of ink with a brayer. Prepare a second ink color with a different brayer as well. Ink the pattern side of the block with the first color.
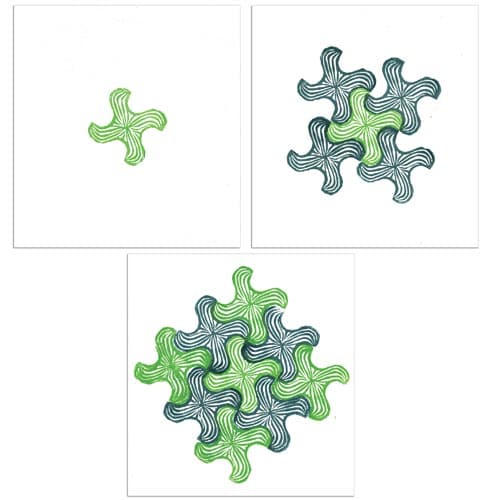 Step 5Stamp the first color in the center of your paper. Clean the stamp, then apply the second color and stamp around the first color, being careful to rotate the stamp so the pattern tessellates. Repeat this process again as many times as you want, alternating ink colors.
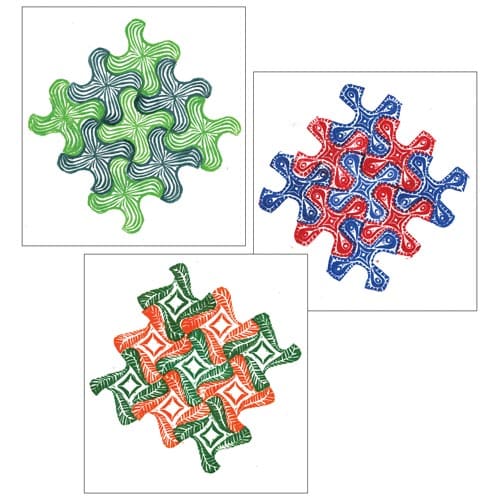
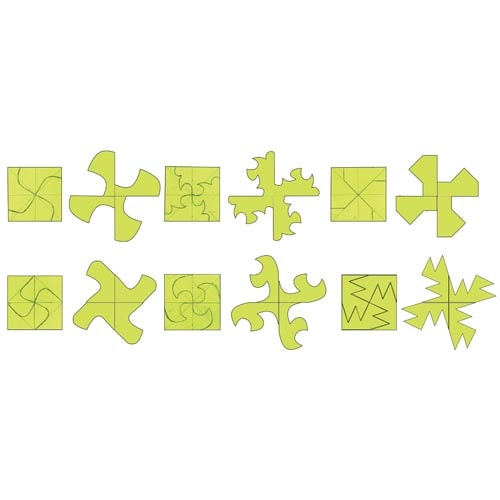 TipHere are some other tessellation designs to try - or come up with your own!