Brilliant Botanical Plaster Molds Project

Time: 3 or More Class Periods
Difficulty: Moderate
Cleanup: Soap & Water
Materials:
Difficulty: Moderate
Cleanup: Soap & Water
Materials:
Model Magic
Casting Plaster
Flowers, Leaves, Grass, or Rubbing Plates
Wire
Long Nose Pliers
Watercolors
Brushes
Oil Pastels
Create a beautiful botanical mold, cast with plaster, then add color with watercolors and oil pastels.
Steps
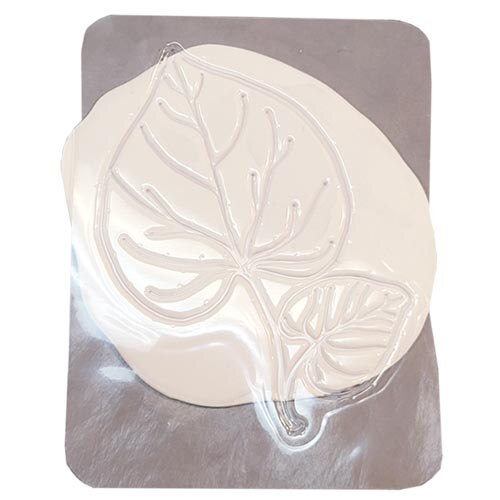 Step 1Knead Model Magic for about a minute until it is flexible. Divide portion in half. Roll one portion into your desired shape. Press flowers, leaves, grass or rubbing plates into the clay to make your desired design.
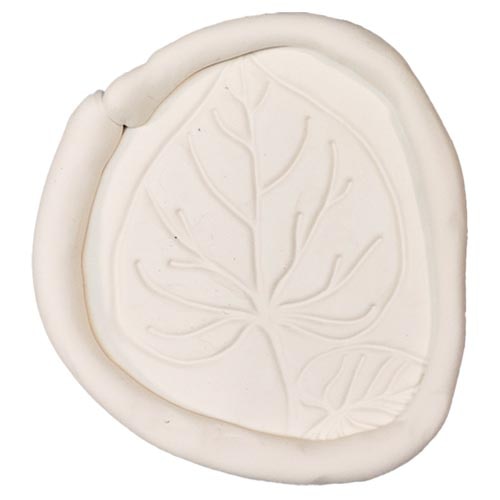 Step 2Roll the second portion into a snake and wrap around the edge of the printed piece using the coil building technique.
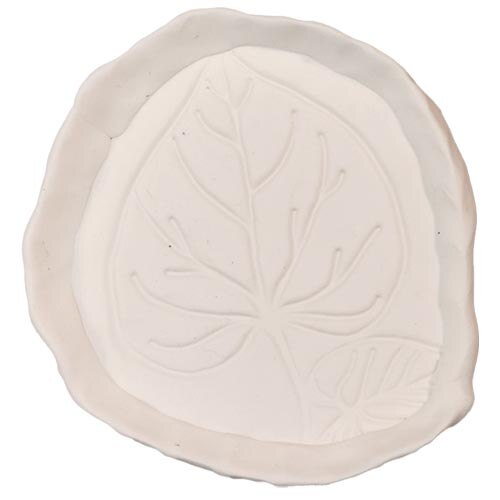 Step 3Pinch the edges gently to create a lip at least 1/2” tall around the form. Allow to dry completely.
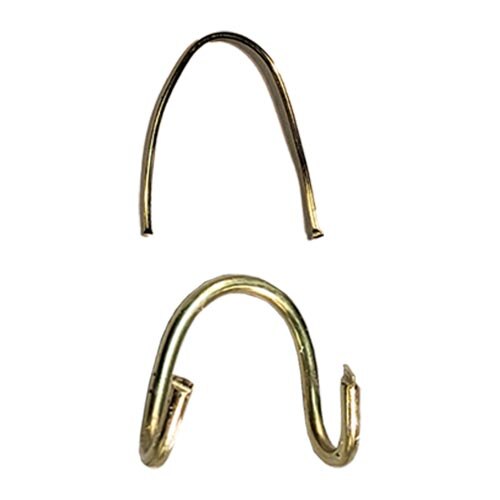 Step 4Cut a portion of wire approximately 1-1/2” long. Bend into a u-shape. Using pliers, curl the ends up a little, making a hook. The hook will help the wire stick in the plaster.
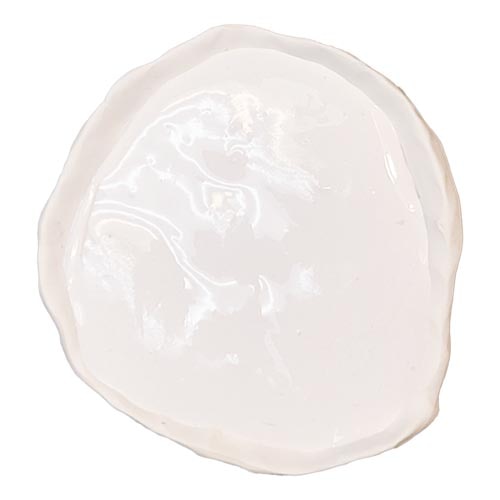 Step 5Mix up a portion of plaster following the directions on the container. It should be the consistency of toothpaste. Gently spoon plaster into the mold. Softly tap the mold on a flat surface to help remove bubbles.
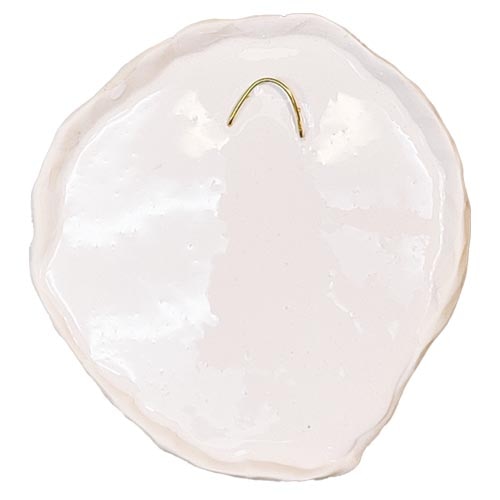 Step 6Place the hook into the wet plaster. Allow to dry completely.
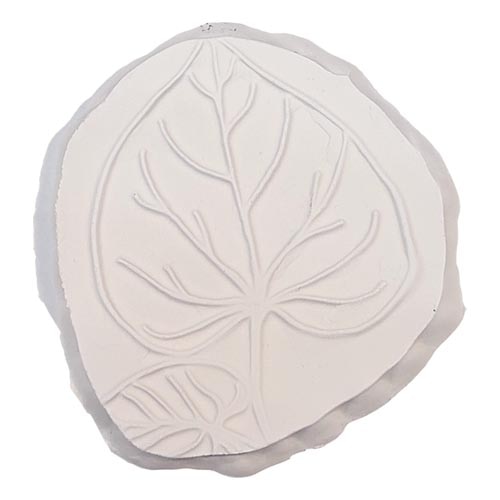 Step 7When completely dry, remove the plaster cast from the mold.
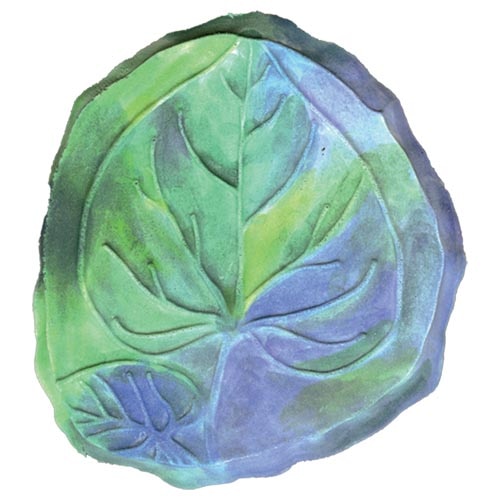 Step 8Using watercolors, paint the dried plaster cast. This process is called fresco-secco. Tips: be generous with water; plaster is extremely porous. Build up colors from lighter to darker.
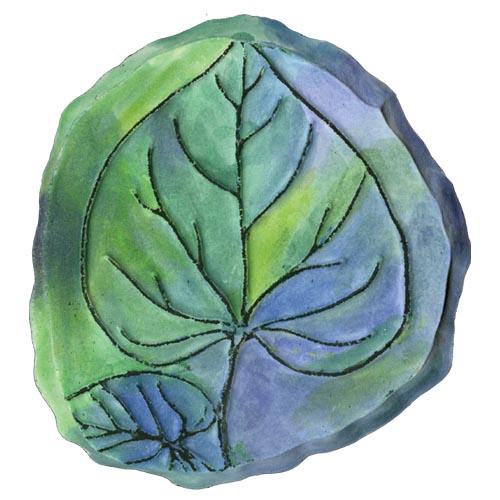 Step 9Using oil pastels, color in the raised portions of the mold, making the outline stand out.
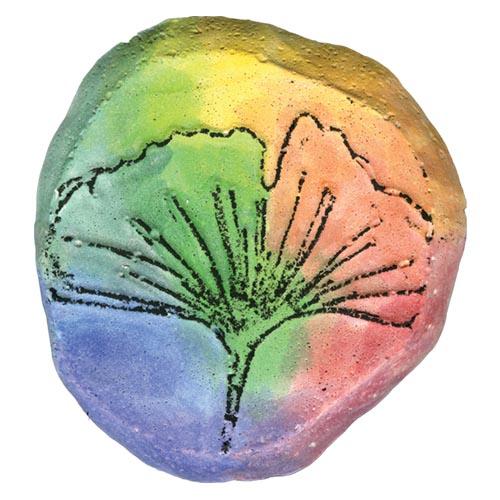 Example 1Ginko Leaf
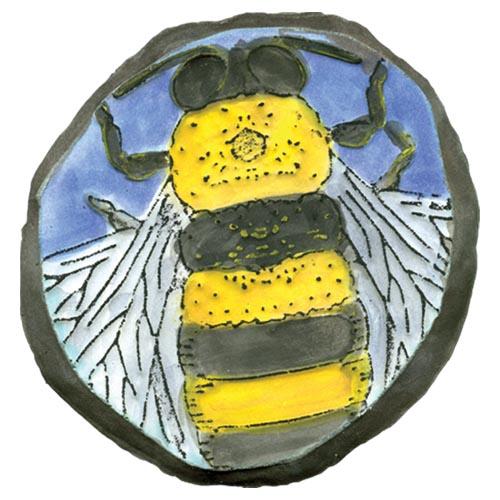 Example 2Bumble Bee
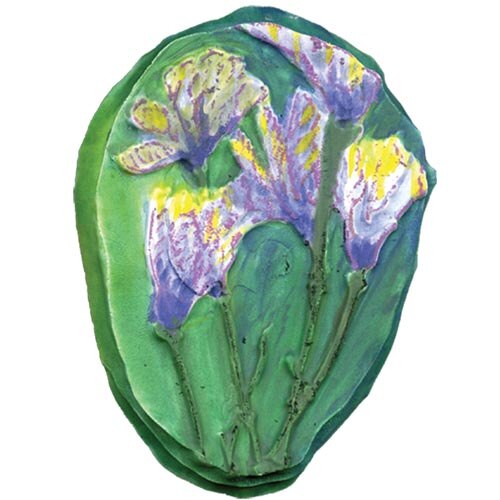 Example 3Flowers
 Example 4Snowflake