Sanded-Paper 3D Ocean Drawings Project
Time: 2-3 Class Periods
Difficulty: Moderate
Cleanup: Soap & Water
Materials:
Difficulty: Moderate
Cleanup: Soap & Water
Materials:
Tacky Glue
Chalk Pastels
Craft Sand in assorted colors
RainbowDepth 3D Glasses
12x18" Construction Paper in assorted colors
Paint Brush
Plastic Bowl
Fixative (optional)
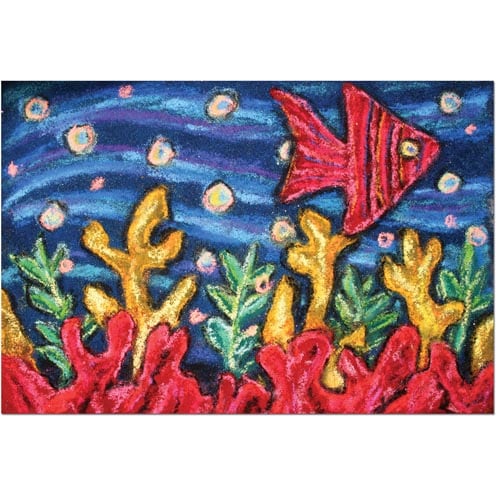
Use glue and different colors of sand to create a picture of the ocean!
Steps
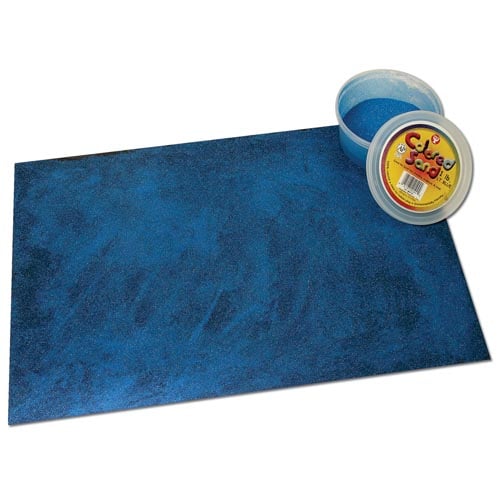 Step 1Mix approximately four parts glue and one part water in a plastic bowl. Brush the thinned glue onto the whole sheet of 12x18" construction paper and then sprinkle blue sand (or a different cool color) evenly over the entire background. Allow glue to dry.
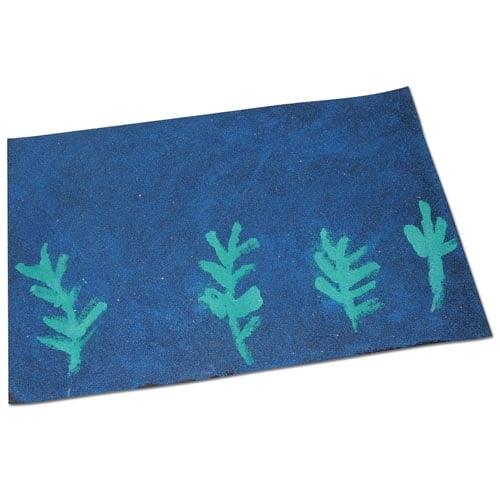 Step 2Decide where to add the first part of your design. Brush on or "draw" your design with the glue. Evenly sprinkle green sand (or a different cool color) onto the glue. Allow glue to dry completely. Remove any extra sand.
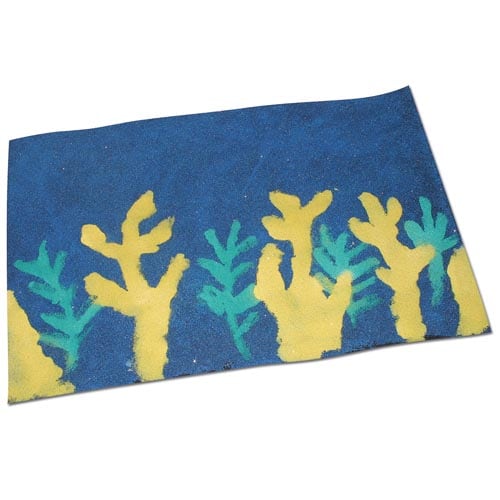 Step 3Decide where to add the second element of your design. This time use a warm color of sand (like yellow or orange). Repeat the rest of Step 2 using your chosen color.
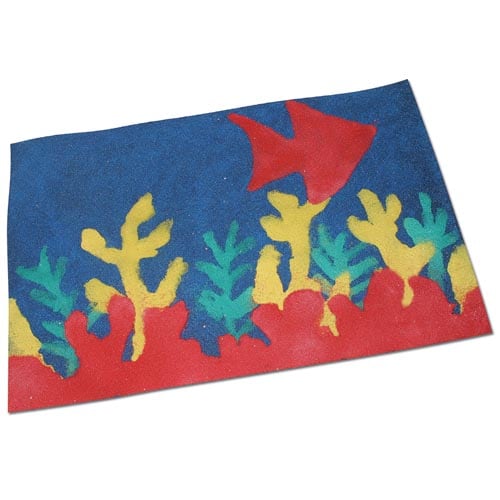 Step 4Decide where to add the third element of your design. Red "pops" the most, so it is a great choice for the foreground, pink also works well. Repeat the rest of Step 2 using your chosen color.
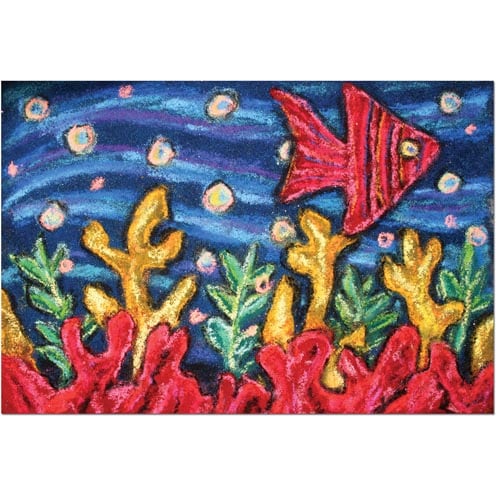 Step 5Next, draw in details and highlights with pastels.
- Step 6The Science of 3D: Warm colors, especially red, appear high or "pop," while cool colors, especially blue, seem low or "recede." Use the 3D glasses to see how the colors look!
- Optional Tip 1For permanence and brilliance, spray the drawing with workable fixative.